How Much Does Insulation Foam Save on Electricity?
by Tyler Castle
20.6 min read
Ever feel like you’re heating the whole neighborhood instead of just your home? You’re not alone! Keeping your house cozy (or cool) can feel like burning cash – quite literally. If you’ve ever looked at your energy bill and wondered if your attic is hosting a tropical vacation on your dime, it might be time to talk insulation.
Let’s dive into how foam insulation can turn your home into a snug energy-saving fortress – no more unplanned ‘contributions’ to outdoor air conditioning!
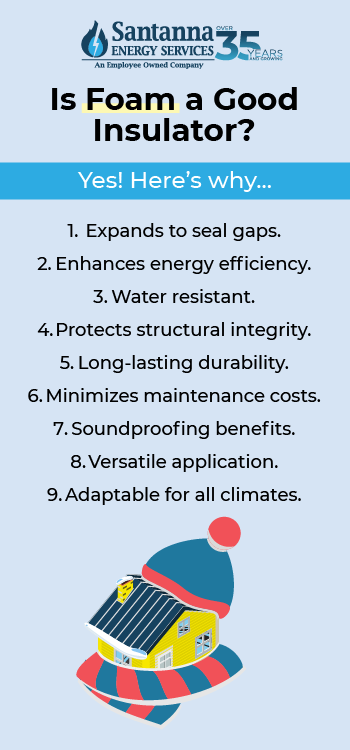
Is Foam a Good Insulator?
The short answer is, yes, foam insulation is considered one of the most effective types of insulation available due to its high R-value and ability to create an airtight seal! The R-value of insulation measures its ability to resist heat transfer, reflecting how effectively the material prevents the flow of heat.
Foam insulation is also considered highly effective and durable. Foam insulation works incredibly well for sheathing basement walls, exterior walls, and unusual applications like attic hatches. In the same way, foam insulation lessens heat transmission through structural components like steel and wood studs and offers good thermal resistance —often twice as effective as many other insulation materials of the same thickness.
Why Foam is a Good Insulator
Spray foam insulation expands upon application, filling gaps, cracks, and hard-to-reach spaces, creating an airtight barrier that significantly reduces air leaks. This helps prevent drafts and enhances energy savings in your home!
Closed-cell foam insulation is resistant to water, reducing the risk of mold and mildew growth, especially in areas like basements, attics, and crawl spaces. This moisture resistance helps protect the structural integrity of the home.
Any type of foam insulation is durable and maintains its insulating properties over time. Unlike fiberglass, which can sag or settle, foam insulation retains its shape and effectiveness for many years, minimizing the need for replacements or repairs.
Foam insulation also provides soundproofing benefits by dampening sound transmission, which can improve indoor acoustics and privacy.
Foam insulation can be used in a wide range of applications, including walls, roofs, basements, and attics. It works well in both residential and commercial buildings, making it a flexible option for different structures and climates.
How Much Does Insulation Foam Save on Electricity?
Savings on your monthly energy bills with foam insulation can vary, typically ranging from 10-15%. Foam insulation helps maintain comfortable indoor temperatures in both winter and summer, keeping your HVAC system from working overtime.
It’s important to note that homes in regions with very hot or cold temperatures often see even greater energy savings, as insulation foam stabilizes indoor temperatures more effectively.
The amount you can save on electricity with foam insulation depends on several key factors, each impacting energy efficiency in different ways:
- Home Size and Layout: Larger homes or homes with multiple stories typically require more heating and cooling, so they benefit more from high-efficiency insulation. Foam insulation’s ability to seal gaps and hard-to-reach areas can enhance energy savings across larger spaces.
- Type and Condition of Existing Insulation: If your home has older or less effective insulation (such as aging fiberglass or cellulose), upgrading to foam insulation can result in substantial savings. When combined with the appropriate amount of insulation, a properly sealed home can significantly reduce your utility costs.
- Installation Quality: Proper installation is crucial for maximizing insulation benefits. Foam insulation should be applied evenly to create a continuous air and thermal barrier. Poor installation can leave gaps, reducing energy efficiency and overall savings.
- R-Value and Thickness: The R-value (thermal resistance) and thickness of foam insulation affect how well it resists heat transfer. Higher R-values provide better insulation, especially for areas like attics and walls where most heat transfer occurs.
- Energy Efficiency of Existing HVAC Systems: Energy savings from insulation are also impacted by the efficiency of your heating and cooling systems.
How Much Does Adding Any Insulation Save on Energy Bills?
On average, insulation can reduce heating and cooling expenses by about 15% (or roughly 11% on total energy costs). Sealing air leaks and adding any form of insulation to draft spaces can significantly improve energy efficiency, reduce utility bills, and create a more comfortable indoor environment.
Types of Foam Insulation
If you’re considering foam insulation for your home, you should consider all your options before you start your project. Here are some of the most common types of foam insulation:
Injection foam insulation acts as both insulation and an air barrier, effectively sealing enclosed spaces, like existing wall cavities, to prevent air movement. This method is effective for retrofitting older homes to improve energy efficiency.
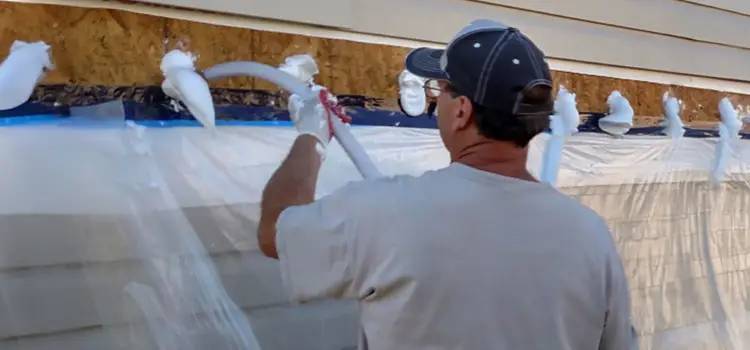
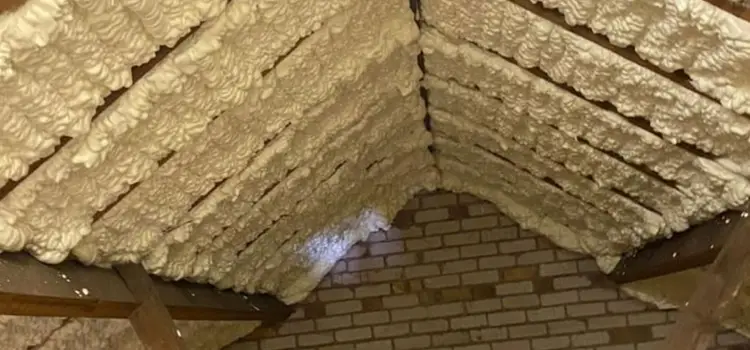
Spray foam insulation has a dual purpose as both insulation and an air barrier, sealing gaps in walls, floors, and ceilings to restrict airflow, and filling areas around outlets, light fixtures, and windows.
Open-Cell Spray Foam Is lightweight with a spongy texture, has a lower R-value per inch, and is permeable to moisture. It’s suitable for interior applications where sound dampening is desired.
Closed-cell spray foam is one of the top insulation options, valued not only for its effectiveness in blocking heat transfer but also for its water resistance and exceptional ability to air-seal your home or building. Denser and more rigid, it offers a higher R-value per inch and acts as a moisture barrier. It’s ideal for areas requiring robust insulation and structural reinforcement.
Closed-cell spray foam insulation stands out as a highly effective solution with numerous benefits. It has an impressive R-value of 7 per inch, tightly seals gaps and crevices, and acts as an exceptional energy conserver. Made from durable inert polymers, spray foam is long-lasting and requires minimal maintenance, making it a sustainable choice that protects against both air and water infiltration for years to come.
Rigid foam board insulation is pre-formed panels used in different parts of a building, including walls, roofs, and foundations. Though not every rigid foam insulation performs the same, rigid foam insulation packs a lot of R-value into a small package. Common types include: Expanded Polystyrene (EPS): EPS is lightweight and resistant to moisture, making it a popular choice for structural insulated panels and insulated concrete forms.
Extruded Polystyrene (XPS): Recognizable by its blue, green, or pink color, XPS offers a higher R-value per inch than EPS and is commonly used below grade applications.
Polyisocyanurate (Polyiso): Provides the highest R-value per inch among foam boards and is typically used in roofing and wall applications.
How Much Does It Cost for Spray Foam Insulation?
The cost of spray foam insulation generally falls between $2,400 and $8,600, with most homeowners spending around $5,500 to insulate a single space, like a basement or garage. Per square foot, spray foam insulation usually costs between $2.75 to $7.50.
Quality insulation is essential for energy savings in your home; without it, heat can easily escape or enter through walls, floors, and ceilings which increases energy costs. For a more in-depth look, here's how much spray foam insulation costs based on where you place it in your home according to Architectural Digest:
Cost of Spray Foam Insulation by Location in Your Home
| Cost by Location in Home | Cost Range |
|---|---|
| Crawl space | $1,000–$5,900 |
| Roof | $2,400–$8,000 |
| Basement | $2,400–$8,400 |
| HVAC system | $2,500–$3,000 |
| Attic | $2,500–$12,000 |
| Garage | $3,600–$8,600 |
| Whole home | $8,000–$30,000 |
Can I Get a Tax Credit for Installing Insulation?
Are there tax credits available for adding insulation to your home to save more energy in your home? An efficiency tax credit can only be used up to $3,200 in a single year. For any combination of home upgrades including insulation. But note that there are annual limits in addition to restrictions on how much credit you may receive for any specific home repair or equipment installation.
How Does Insulation Prevent Energy Loss From Your Home?
Energy loss in a home occurs when heat escapes in winter or enters in summer, making your heating or cooling system work harder to maintain a comfortable temperature. Heating your home accounts for 42% of energy consumption in the residential sector.
Space heating in U.S. households costs $519 on average, leading to increased energy usage and higher bills. Insulation foam helps prevent this energy loss by addressing the three primary methods of heat transfer:
Convection: Convection is the movement of heat through air currents. In an uninsulated home, warm air can easily escape through gaps and cracks in walls, ceilings, and floors, causing drafts. Spray foam insulation reduces convective heat loss by filling these gaps and forming a continuous airtight seal.
Conduction: Conduction occurs when heat transfers through solid materials, like walls, floors, and ceilings. Without proper insulation, heat can easily pass through these surfaces, especially in winter when warm indoor air comes into contact with cold outer walls. Foam insulation can slow down conductive heat transfer, keeping heat where it’s needed and reducing the load on your HVAC system.
Radiation: Radiant heat transfer happens when heat travels in waves, such as from the sun hitting your roof and walls. Foam insulation acts as a thermal barrier that reduces radiant heat gain, keeping the home cooler in hot weather and reducing the need for air conditioning.
Signs Your Home Needs Better Insulation
Foam is one of the most important things to keep an eye on when it comes to creating a comfortable home environment. Insulation shouldn’t be taken lightly; the longer you wait to repair, the more it will cost you in the long run. Here are some clear signs your home needs better insulation:
- Uneven Indoor Temperatures: If rooms in your home have noticeably different temperatures, especially between floors or in different parts of the house, it may signal inconsistent or insufficient insulation.
- High Energy Bills: Rising heating and cooling costs often point to inadequate insulation, as your HVAC system has to work harder to maintain a comfortable temperature.
- Drafts: Feeling drafts near windows, doors, or walls is a common sign of poor insulation. Drafts indicate air leaks where warm or cool air is escaping, causing discomfort and inefficiency.
- Cold Walls, Ceilings, and Floors: If the interior surfaces of your home feel cold in winter, it’s a sign that heat is escaping through these areas. Proper insulation can help maintain warmer surfaces, improving comfort.
- Frozen Pipes: In cold weather, poorly insulated walls can allow pipes to freeze, potentially leading to costly repairs. Insulating walls and crawl spaces can help prevent this issue.
- Rodents and Bugs in Your Home: Poor insulation, especially in attics and crawl spaces, often has gaps or cracks that allow pests like rodents and insects to enter. Well-sealed insulation can help keep pests out.
- Icicles on Your Roof: Icicles, or ridges of ice forming along the roof’s edge, are often caused by escaping heat that melts snow on the roof. This issue indicates poor attic insulation.
- Excessive Noise: If your home is noisier than expected, it may lack effective insulation, which also functions as a sound barrier to reduce external and internal noise.
- Dusty Rooms: High levels of dust in certain rooms may be due to air leaks in uninsulated areas, allowing dust to be pulled in from attics, basements, or crawl spaces.
- Increased Allergy Symptoms: Inadequate insulation can allow outdoor allergens and pollutants to enter your home, potentially worsening allergy symptoms for residents.
Best Spots to Install Insulation in Your Home
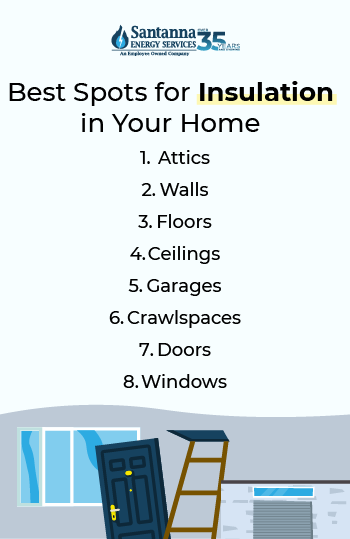
Attics: The attic is where the majority of heat loss occurs. Obtain estimates from many attic insulation providers; they can even suggest the best kind of insulation for your attic.
Walls: Insulating external walls is more crucial than interior walls because it facilitates the conduction of heat.
Floors: Insulating your floor above unconditioned areas, such as garages, crawl spaces, and basements, can help reduce heat transmission and increase comfort. For the greatest energy savings, you can even insulate your basement.
Ceilings: Insulating ceilings, especially in multi-story homes, can help prevent heat transfer between floors, maintaining a consistent temperature and improving energy efficiency.
Doors and Windows: Adding insulation around doors and windows through weatherstripping or spray foam helps seal gaps and reduces drafts, preventing energy loss.
Do-It-Yourself Spray Foam Insulation Kits: Worth It or Not?
For homeowners looking to save on installation costs, DIY spray foam insulation kits may seem like an appealing option. But are they worth the investment and effort? Let’s explore the pros and cons of each
Pros of do-it-yourself spray foam insulation kits:
Cost Savings: DIY kits can save on labor costs, making them affordable for small projects.
Flexibility: Allows you to work on your schedule, ideal for targeted areas like attic corners or basement bands.
Availability: DIY kits are accessible at home improvement stores and online, often with basic instructions.
Cons of do-it-yourself spray foam insulation kits:
High Risk of Errors: Improper application can result in uneven foam or off-ratio issues, which may require costly removal and re-application.
Safety Hazards: DIY kits can lack personal protective equipment (PPE), increasing health risks from chemical exposure if precautions aren’t followed.
Lower Quality Control: DIY equipment lacks temperature and pressure controls, risking poor foam quality compared to professional installation.
Increased Time Investment: DIY projects require significant time for research, preparation, and physical labor, often stretching over several days for large areas.
Limited Insurance Coverage: DIY installation lacks warranties or insurance, so any installation errors or product failures are solely the homeowner’s responsibility.
How Much Spray Foam Insulation Do I Need?
To determine how much spray foam you require, take the following actions:
- Measure Wall Dimensions: Measure the height and length of each wall you plan to insulate. Multiply these dimensions to calculate the square footage of each wall. Repeat for each wall to get an accurate total.
- Calculate Ceiling or Attic Area: Measure the length and width of the attic or ceiling. Multiply these measurements to find the total square footage of these areas as well.
- Add Up All Surface Areas: Sum the square footage of all walls, ceilings, and attics that need insulation to find the total area that requires spray foam insulation. This total area is crucial for determining the quantity of spray foam you’ll need.
- Account for Desired Insulation Depth: Spray foam is applied in layers, and different insulation goals may require different thicknesses. Closed-cell foam typically provides better insulation at thinner layers, while open-cell foam may require thicker application to achieve similar R-values (insulation ratings). Consider your local climate and insulation goals when deciding on thickness.
For open-cell foam, spray foam insulation typically costs $1 to $3 per square foot, whereas closed-cell foam costs $1.50 to $4. Depending on the kind of foam and the necessary thickness, this can run from $2,000 to $8,000 for a 2,000-square-foot home.
Safety with Foam Insulation
Whether you choose to DIY or hire out help with your foam insulation, you should always keep safety in mind. Spray foam insulation involves chemicals that can be hazardous if not handled properly. Be sure to wear protective gear like goggles, gloves, and a respirator is essential.
Ensure proper ventilation in the work area to avoid inhaling fumes, and carefully follow the manufacturer’s instructions for application. Before you get started, here’s what you need to know about foam insulation:
Is Spray Foam Insulation Toxic?
Spray foam emits chemicals like isocyanates during installation that can cause allergic reactions including itching and watery eyes, skin rashes, asthma, and other breathing difficulties. Once cured (typically within 24 hours), spray foam is generally non-toxic. Ensure proper ventilation and avoid the area until curing is complete.
Is Spray Foam Insulation Flammable?
Nearly all spray foam insulation sold in the US has some flame retardant because untreated foam accelerates fires. If these foam materials are subjected to strong heat or flame without treatment, they will burn quickly.
However, the use of fire retardant by spray foam makers does not imply that the product is fire resistant. According to fire standards, the foam must be coated with a intumescent paint to provide a 15-minute thermal barrier protection for spray foam insulation. When exposed to heat, a coating must expand and generate a char that insulates and shields the underlying material from fire in order to be deemed intumescent.
Avoid placing spray foam insulation near potential ignition sources, such as light fixtures or electrical outlets, unless they are appropriately protected. Consult a professional installer to ensure fire safety measures are in place.
Is Foam Insulation Waterproof?
Due to its low density, open-cell spray foam insulation is not waterproof. However, closed-cell spray foam is waterproof, making it a dependable choice for insulation, regardless of your home’s location or external conditions.
How To Remove Spray Foam Insulation
While spray foam insulation is durable and effective, there may be times when it needs to be removed—whether for remodeling, repairs, or correcting an application error. Removing spray foam can be a challenging process but with the steps and safety process, it can be a smooth removal. Here’s how you can remove spray foam insulation with a machine:
How to Remove Spray Foam Insulation with a Machine
- Put Your Mask On: Wear a mask to protect yourself from airborne particles and fumes during the removal process.
- Connect the Spray Foam Machine to the Vacuum Hose: Attach the machine to a vacuum hose for efficient foam collection and cleanup.
- Remove the Spray Foam from the Wall: Use the machine to strip foam from the wall, moving it steadily to avoid surface damage.
- Vacuum Up the Old Insulation: Collect the removed foam with the vacuum to minimize mess and prepare for disposal.
- Apply the Lacquer: Finish by applying lacquer to dissolve any lingering residue, ensuring a thorough cleanup.
How To Remove Foam Insulation From Hands
- Act Quickly: If the foam is still wet, wipe it off immediately using a disposable cloth or paper towel. The sooner you act, the easier it will be to remove.
- Avoid Water Initially: Do not wash your hands with water while the foam is wet, as this can cause it to cure faster and make removal more difficult.
- Use a Gentle Solvent: Apply a small amount of acetone (such as nail polish remover) to a cloth or cotton ball and gently rub the foam. Test on a small area of skin first to ensure no irritation occurs.
- Scrub with Soap and Warm Water: After most of the foam is gone, wash your hands thoroughly with warm, soapy water and use a soft-bristled brush to remove any remaining residue.
Can the Drywall Get Damaged By Foam Insulation?
Yes, drywall can potentially be damaged by foam insulation, particularly if it is improperly installed as improper insulation installation could potentially lead to drywall issues, such as cracking or moisture retention. However, with closed-cell spray foam insulation applied correctly, these risks are minimized, and in many cases, it can even help strengthen and prolong the life of your drywall.
Here’s what you should know about foam insulation and drywall damage:
Expansion Pressure: Spray foam insulation, especially closed-cell foam, expands as it cures. If it is over-applied or applied too thickly, the expanding foam can put pressure on the drywall, potentially leading to cracking or bulging.
Moisture Retention: If foam insulation is applied to areas with existing moisture problems or water infiltration, it can trap moisture against the drywall. Over time, this moisture buildup can lead to mold growth, weakening the drywall and potentially causing it to deteriorate.
Improper Installation: Applying foam insulation requires precision. Professionals know how to apply foam in controlled layers, allowing each layer to cure before adding more. This approach minimizes the risk of expansion-related issues that could damage drywall.
How to Repair Drywall After Injection Foam Insulation
- Inspect the Area: Look for any excess foam that may have expanded beyond the drilled holes. Use a utility knife to trim back any overfill, ensuring it’s flush with the wall surface. Confirm that there are no cracks or significant damage to the drywall around the injection points. If you notice any, they may need repair before proceeding.
- Prepare the Injection Holes: Lightly sand the area around each hole to remove any rough edges left from the injection process. This ensures a smoother surface for the patching compound to adhere to. Dust off any loose particles with a soft cloth to ensure the area is clean and ready for repair.
- Patch the Holes: Use a putty knife to fill each hole with joint compound or spackling paste. Smooth it over the hole, slightly overfilling to allow for sanding later. Allow the compound to dry completely according to the product’s instructions, usually 24 hours.
- Sand and Smooth the Surface: Use fine-grit sandpaper (180-220 grit) to smooth the dried compound until it’s level with the surrounding wall. For larger holes, you may need a second coat of compound. Apply it, let it dry, and sand again to achieve a seamless finish.
- Prime and Paint: Apply a coat of primer over each patch to prevent color variations. Let it dry fully before painting. Use the same color and finish as the surrounding wall to paint over the patch. For best results, use a roller or brush that matches the wall’s texture.
- Final Inspection Look closely at the repaired spots to make sure they blend in seamlessly with the rest of the wall. Touch up as needed.
Tips to Avoid Drywall Damage with Foam Insulation
- Use Qualified Professionals: Foam insulation requires precise application. Hiring certified professionals ensures the correct techniques and thickness levels are applied to prevent over-expansion, which can stress drywall.
- Check for Existing Issues: Before insulation, inspect your walls for any existing moisture or structural problems. Foam can trap moisture, so it’s essential to fix any issues beforehand.
- Apply in Controlled Layers: Closed-cell foam should be applied in thin layers, allowing each layer to cure before adding the next. This prevents over-expansion and keeps pressure on the drywall minimal.
- Maintain Proper Ventilation: During installation, ensure the area is well-ventilated to prevent excess humidity, which could affect both the curing process and the drywall.
Other Ways to Lower Your Energy Bill Besides Adding Insulation
- Sealing Your Home Through Caulking and Weather Stripping: Gaps around windows, doors, and other openings can allow air to escape, leading to higher energy bills. Sealing these areas with caulk or weather stripping creates a tighter seal, helping to keep your home comfortable year-round.
- Updating Your Aging HVAC System: Older heating and cooling systems tend to use more energy. Replacing your HVAC system with an energy-efficient model can significantly reduce energy consumption, especially during peak heating and cooling seasons.
- Installing Energy-Efficient Appliances and Lighting: Energy-efficient appliances, such as ENERGY STAR-certified refrigerators, washers, and dryers, use less electricity than older models. LED lighting can also reduce energy usage compared to traditional bulbs, lowering your overall costs.
- Using a Smart Thermostat to Better Manage Energy Consumption: Smart thermostats allow you to control your home’s temperature remotely and can learn your schedule to adjust heating and cooling automatically. This helps optimize energy usage, especially when you’re not home, contributing to additional savings.
- Installing Solar Panels: While an upfront investment, solar panels can reduce your reliance on grid electricity, lowering your energy bills over time and even generating power credits in some cases.
- Switching to Low-Flow Fixtures: Reducing hot water usage with low-flow showerheads and faucets decreases both water and energy bills by easing the load on your water heater.
- Using Ceiling Fans for Better Air Circulation: Ceiling fans help evenly distribute heated or cooled air, allowing you to reduce HVAC usage without sacrificing comfort.
Foam insulation is a powerful tool for enhancing energy efficiency and comfort in your home. From reducing heat transfer through walls and ceilings to lowering monthly energy bills, it offers an effective solution to minimize energy loss. Understanding the types of foam insulation, knowing how to estimate costs, and being aware of potential safety issues are all essential steps to making an informed choice for your home.
Whether you decide to tackle insulation as a DIY project or bring in a professional, the long-term benefits of proper insulation—like lower energy costs, improved indoor air quality, and even noise reduction—make it a worthwhile investment. For additional peace of mind and predictable energy costs, consider Santanna Energy Services’ Unlimited Energy Plan. With this plan, you can stabilize your monthly energy expenses, regardless of how much energy you use*.
Ultimately, investing in quality insulation is about more than saving money—it’s about creating a sustainable, comfortable, and efficient environment for you and your family.
* Restrictions apply. Enrollment based upon program eligibility. Customers using more than 125% of normal monthly usage as determined by Santanna may be required to switch plans.
Tyler is an experienced energy professional, having worked for Santanna Energy Services, for the past four years. He is passionate about renewable energy and believes that diversifying the energy grid is the key to a sustainable future. Tyler is dedicated to supplying consumers with the best possible energy solutions and works diligently to make sure that Santanna can deliver the highest quality service.


