How to Change an Electrical Outlet: Energy-Saving Tips, Safety Advice & More

by Tyler Castle
27.6 min read

Let's face it—outlets aren't something most of us think about until they stop working, look burned, or just don't fit our modern needs. Times have changed—especially with smart plugs and USB chargers now part of everyday life. But here's the thing: electrical outlet work is more than just a quick fix. It's directly tied to how safely and efficiently your home uses energy, and that makes it worth paying attention to.
In this guide, we'll show you how to change an electrical outlet, spot signs it's going bad, explore energy-saving upgrades, and know when to DIY or leave it to a pro. Read on to get the full breakdown.
Key Points of This Article:
- Safety first! Always turn off the power at the circuit breaker and use a non-contact voltage tester to ensure the outlet is de-energized.
- Learn the types of outlets right for your job from standard, GFCI, AFCI, smart, and USB/combo outlets, each suited for different needs and locations.
- Learn the steps to change a standard outlet. Identify the reason for replacement, turn off the power, confirm it’s off, remove the wall plate and outlet, inspect wiring, document configuration, disconnect wires, prepare the new outlet, connect wires, secure the outlet back into the box, install the wall plate, turn the power back on, and test the outlet.
What You Need to Know Before You Work On Your Outlet
Before you even think about unscrewing that faceplate, let’s cover the non-negotiables. Electrical outlets are connected to your home’s wiring system, and even a simple mistake can cause electric shock, fire hazards, or code violations. That’s why knowing the basics and your limits are essential.
Start with Safety
Electrical work may seem simple, but it can carry serious risks if not done properly. According to the National Fire Protection Association (NFPA), from 2019 to 2023, electrical systems and lighting equipment—such as wiring, cords, plugs, and fixtures—were involved in an estimated 31,647 home structure fires each year.
That’s why safety must always come first. Before you touch anything, turn off the power at the circuit breaker that controls the outlet. Then, use a non-contact voltage tester to confirm the outlet is completely de-energized. Skipping this step could expose you to an electric shock or worse.
Know Your Outlet Type
Not all outlets are created equal, and choosing the right one matters for both safety and function. We’ve done the research for you and found the most common outlet types:
- Standard outlets (15A or 20A): These are commonly used in general living spaces such as bedrooms, living rooms, and hallways.
- GFCI (Ground Fault Circuit Interrupter) outlets: These types of outlets are required in moisture-prone areas like kitchens, bathrooms, and garages. These outlets are designed to shut off power quickly to protect you from electrical shock.
- AFCI (Arc Fault Circuit Interrupter) outlets: These are designed to detect dangerous arcing in wiring that could lead to electrical fires. These are often required in bedrooms and in newer construction by building codes.
- Smart Outlets: Smart outlets allow for remote control, scheduling, and even energy monitoring through apps, making them ideal for smart home integration.
- USB/Combo outlets: These kinds of outlets combine standard plug slots with USB ports, allowing you to charge devices directly without the need for bulky adapters.
Before replacing any outlet, be sure to match its amperage, voltage rating, and grounding type with the correct type of outlet so you don’t over- or underpower your outlet. If you’re unsure, always consult a licensed electrician to find what you need.
Know the Tools You’ll Need to Change Your Electrical Outlet
Having the right tools isn’t just convenient—it’s essential for safety and accuracy. Here’s what you’ll need and why each item matters:
- Non-contact voltage tester: This is used to confirm that the power is truly off before you touch any wires. Simply hold it near the outlet or wires—if it lights up or beeps, the circuit is still live. This is your first line of defense against electrical shock.
- Screwdrivers (Flathead and Phillips): These are used to remove the faceplate and unscrew the outlet from the electrical box. Most outlets use Phillips screws, but a flathead may be needed for older hardware or prying off plates.
- Wire stripper: This tool strips the protective insulation from the ends of electrical wires, exposing the bare copper for proper connection to the new outlet. Avoid using knives or scissors—they can damage the wire or cause injury.
- Needle-nose pliers: These are helpful for bending wires into hooks for securing around screw terminals or for holding wires in tight spaces. They are also useful for removing old wire nuts or gently pulling wires from terminals.
- New outlet (same amperage & voltage rating): You should choose a replacement outlet that matches your existing one, typically 15 or 20 amps. If you’re upgrading to a GFCI, USB, or smart outlet, make sure your wiring supports the new model.
- Wall plate: This covers the outlet and provides a clean, safe finish. Consider replacing old or cracked plates while you’re at it to improve appearance and safety.
- Flashlight or headlamp: Many breaker boxes or outlet locations, such as basements or behind furniture, aren’t well lit. A hands-free light source allows you to work more safely and see clearly.
- Electrical tape (optional but helpful): You can use this to wrap around terminal screws for added safety or to secure wire nuts in place. While not always required, it offers an extra layer of precaution.
- Multimeter: A more advanced tool compared to a voltage tester, a multimeter measures voltage, resistance, and continuity. It is especially useful if you’re diagnosing outlet problems or confirming proper wiring during or after installation.
Be Aware of Older Wiring
If your home was built before the 1970s, there’s a chance it may contain aluminum wiring or ungrounded outlets—both of which require extra caution and are best left to licensed electricians. These systems pose serious fire and safety risks if not handled properly.
In fact, according to the home improvement giant Angi, homes with aluminum wiring are up to 55 times more likely to have fire-prone outlets because of loose connections that significantly increase the risk of overheating. Ungrounded outlets, on the other hand, offer no protection for sensitive electronics and can lead to costly damage.
Pro Tip: If you see two-prong outlets, it’s a sign your system may not be grounded. You’ll want an electrician to assess before upgrading to three-prong models.
How to Change an Electrical Outlet
Changing a wall outlet might seem simple, but it requires attention to detail and strict safety. If done correctly, this small upgrade can improve your home’s safety and energy performance. However, improper installation can increase the risk of electric shock or even cause a house fire. To help you do it safely and effectively, here’s a complete guide on how to change an electrical outlet:
Step 1: Identify Why You’re Replacing the Outlet
Before you begin, it’s important to know why you’re changing your electric outlet. Decide if you’re replacing the outlet due to:
Age or visible wear (cracks, loose grip): Aged outlets often need a standard replacement. You’ll likely only need a new 15A or 20A outlet, screwdrivers, and a voltage tester to complete this job. Still, once you open the box, inspect for brittle insulation or signs of outdated wiring.
Burn marks or signs of overheating: This could point to overloaded circuits, poor connections, or internal arcing. You may need a multimeter to check voltage, wire cutters to trim back burnt copper, and electrical tape. If damage extends into the wall, call a licensed electrician.
A need for a GFCI or smart upgrade: GFCI outlets require identifying line and load terminals correctly, often needing a multimeter or continuity tester. Smart outlets may require a neutral wire or extra space in the box. Be sure to follow the manufacturer’s instructions exactly.
It no longer holds plugs securely: Worn contact points inside the outlet are usually a quick fix with a basic replacement. Use a voltage tester, screwdrivers, and a matching outlet. Still, be cautious—loosened plugs may have caused heat damage over time.
Each of these situations may involve different tools, outlet types, or risks, so identifying the issue early helps you prepare and avoid complications.
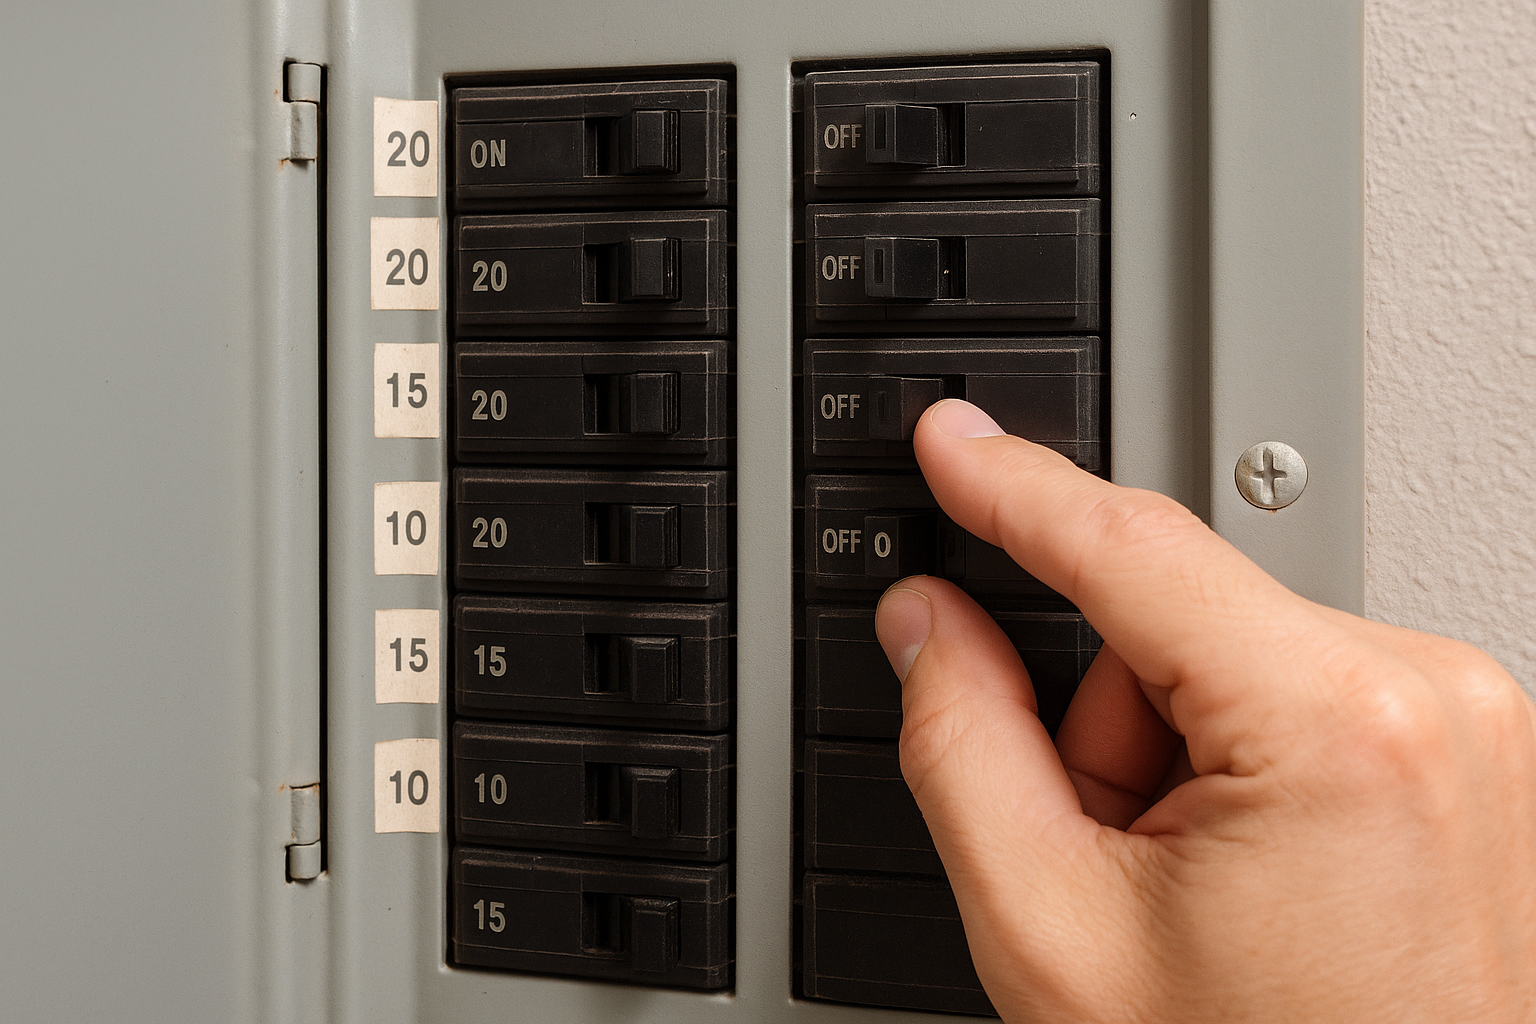
Step 2: Turn Off the Power at the Breaker Panel
Before handling any electrical components, make safety your top priority. Go to your home’s breaker box and shut off the power to the circuit that controls the outlet. This simple step in changing an electrical outlet can prevent electric shock or serious injury. Label your breakers if you haven’t already—it makes future DIYs easier.
Step 3: Confirm the Power Is Off
Use a non-contact voltage tester to check the outlet. Insert the tester into each slot and against each screw terminal to confirm the power is completely off. Never skip this step! Many accidents happen when people assume the power is off but don’t test it.
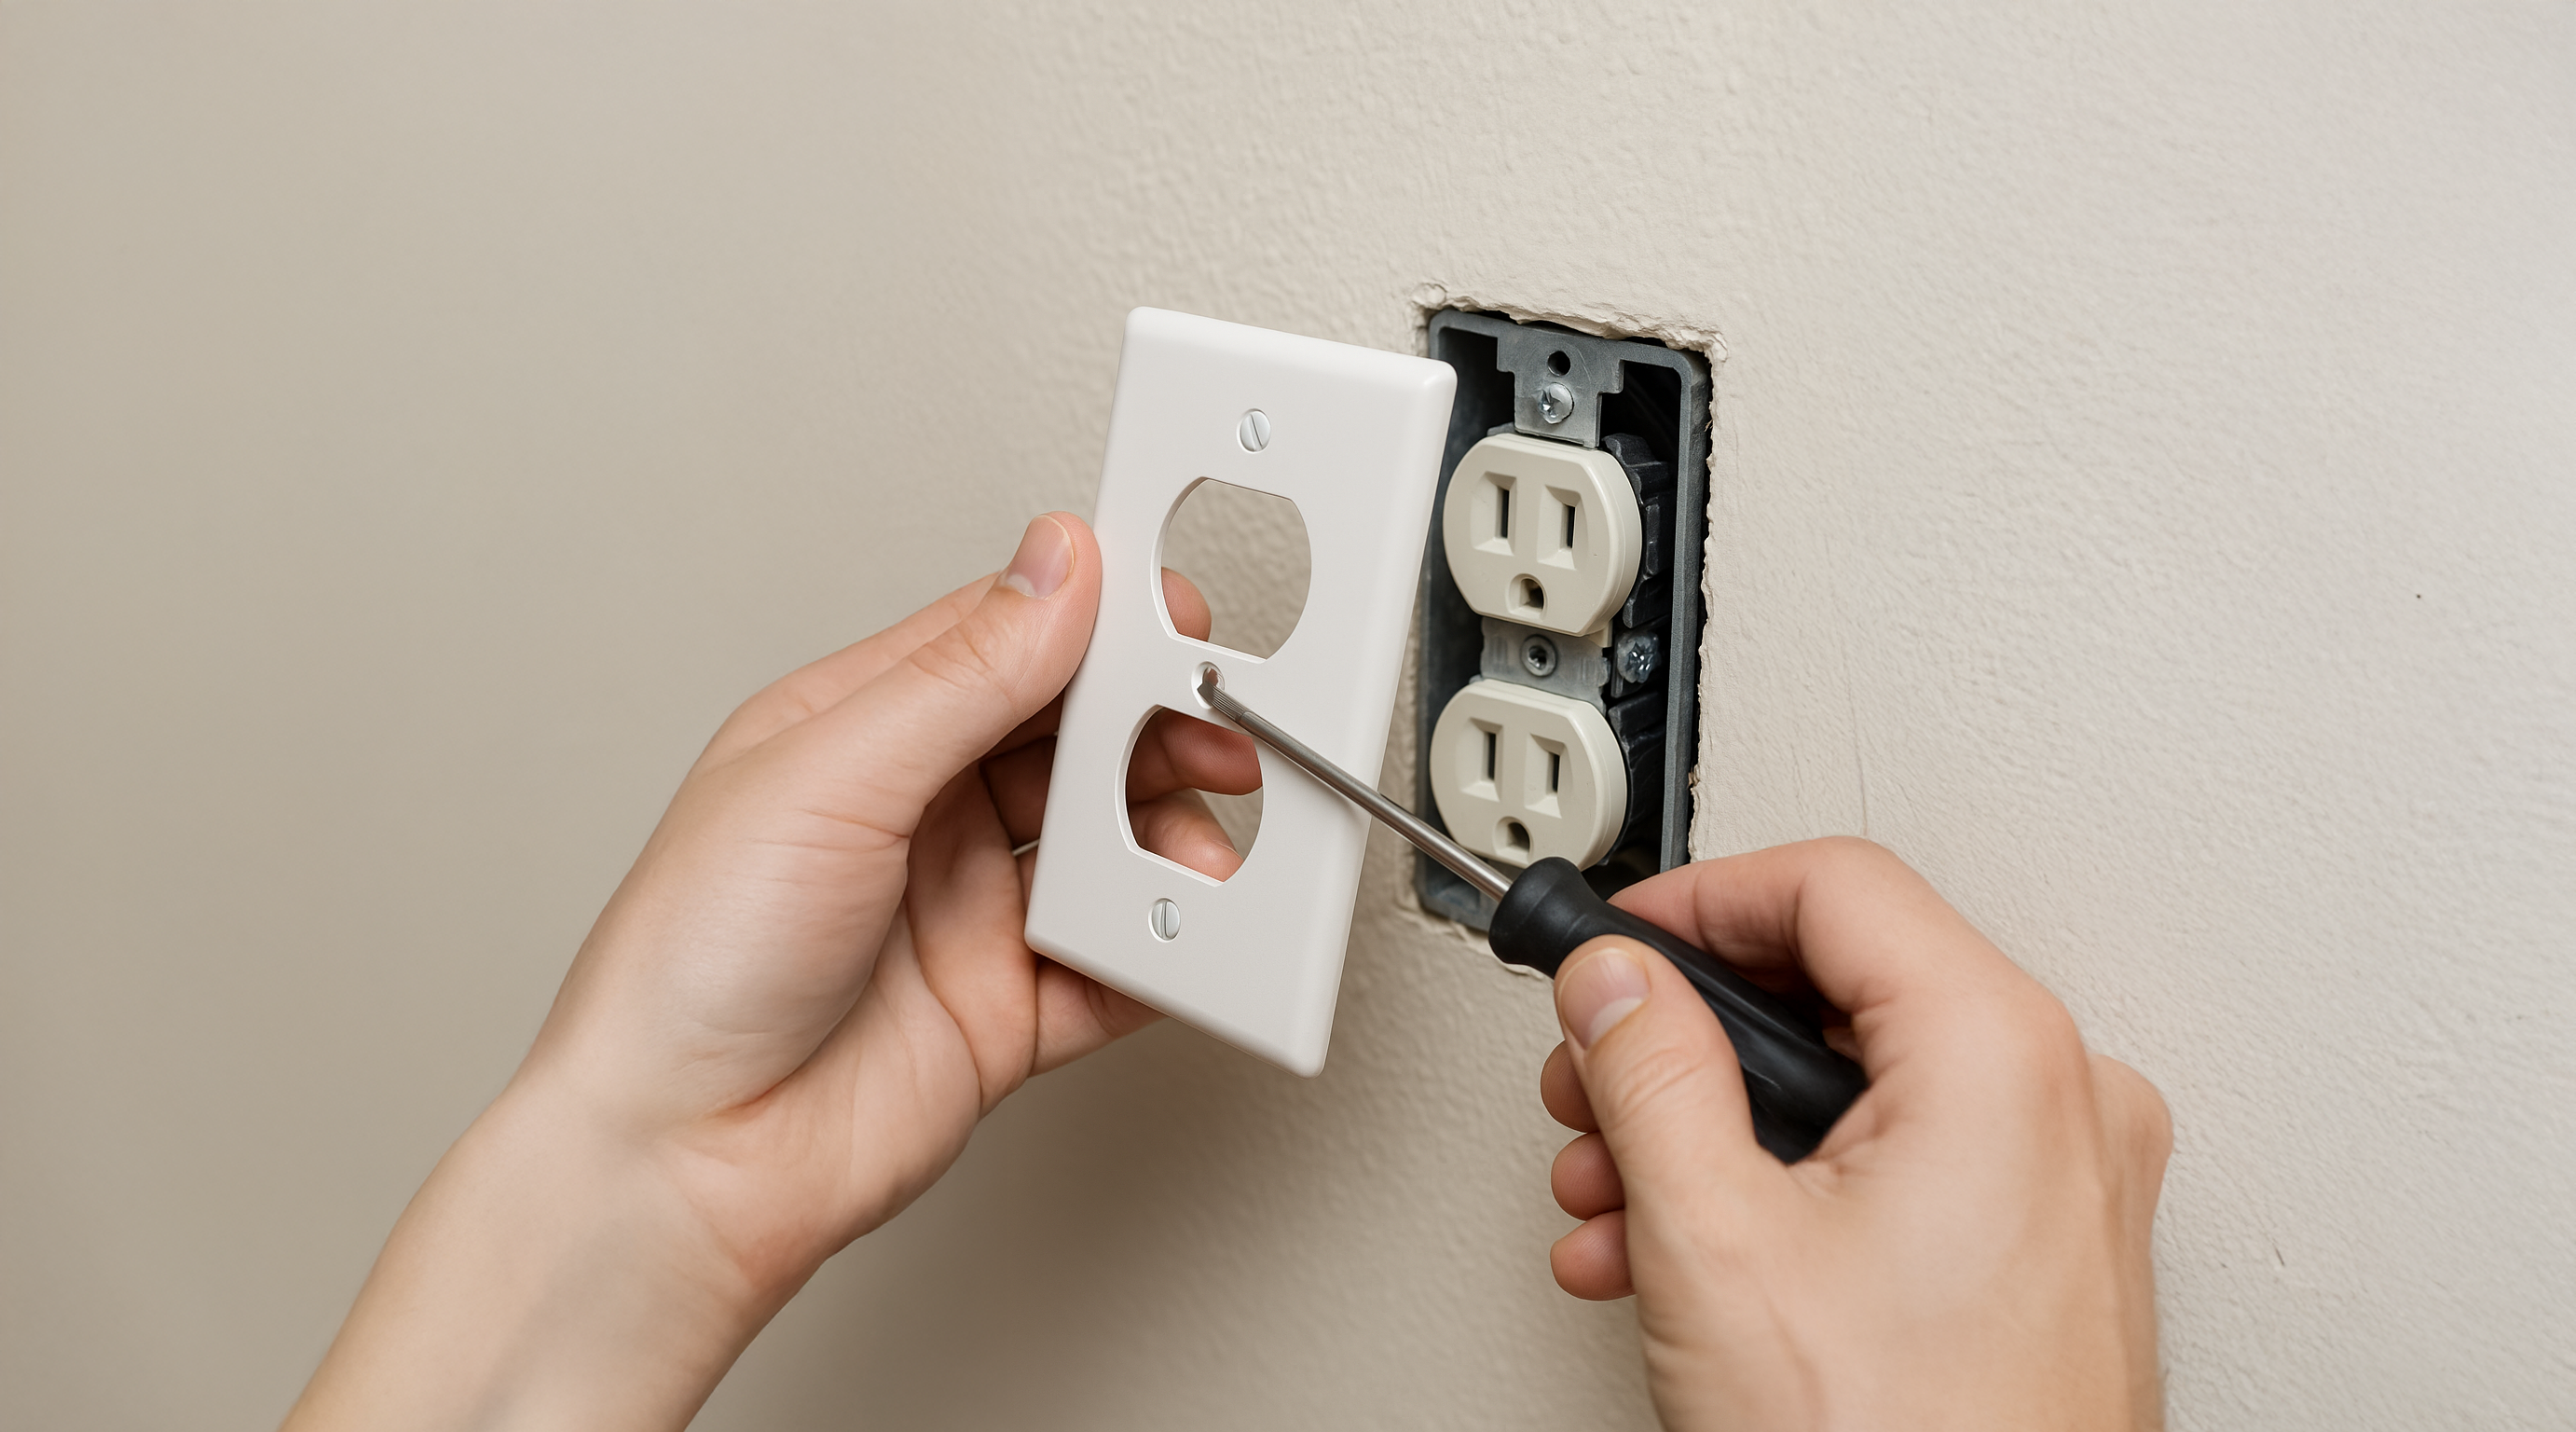
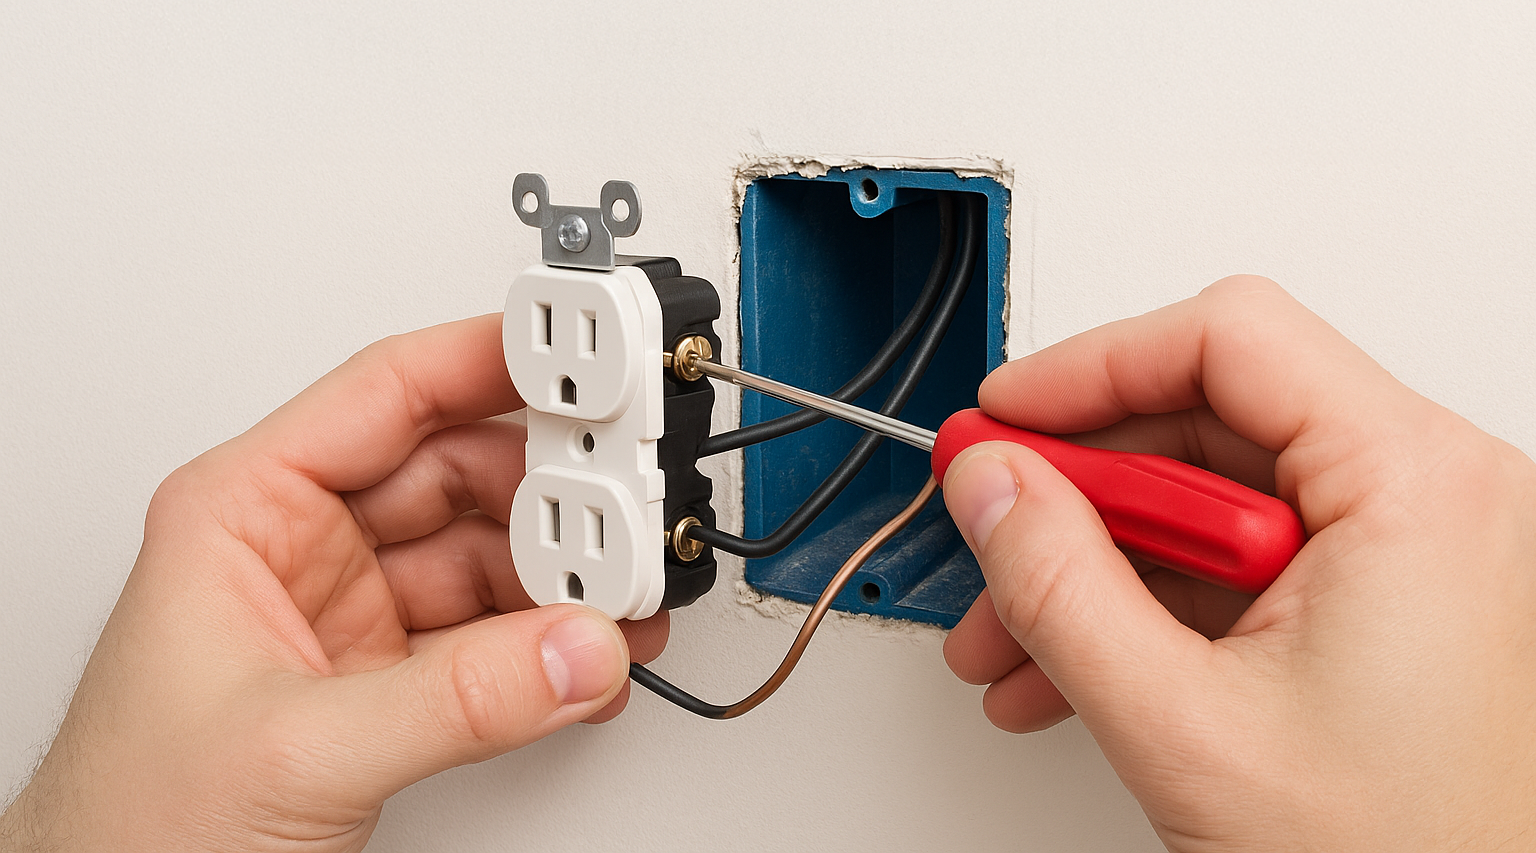
Step 4: Remove the Wall Plate and Unscrew the Outlet
To begin the physical part of changing an electrical outlet, you’ll need to remove the faceplate and the outlet itself. Using a flathead or Phillips screwdriver, carefully unscrew and remove the wall plate that covers the outlet. Once the cover is off, locate and unscrew the mounting screws that secure the outlet to the electrical box. Gently pull the outlet out from the box to expose the wiring behind it.
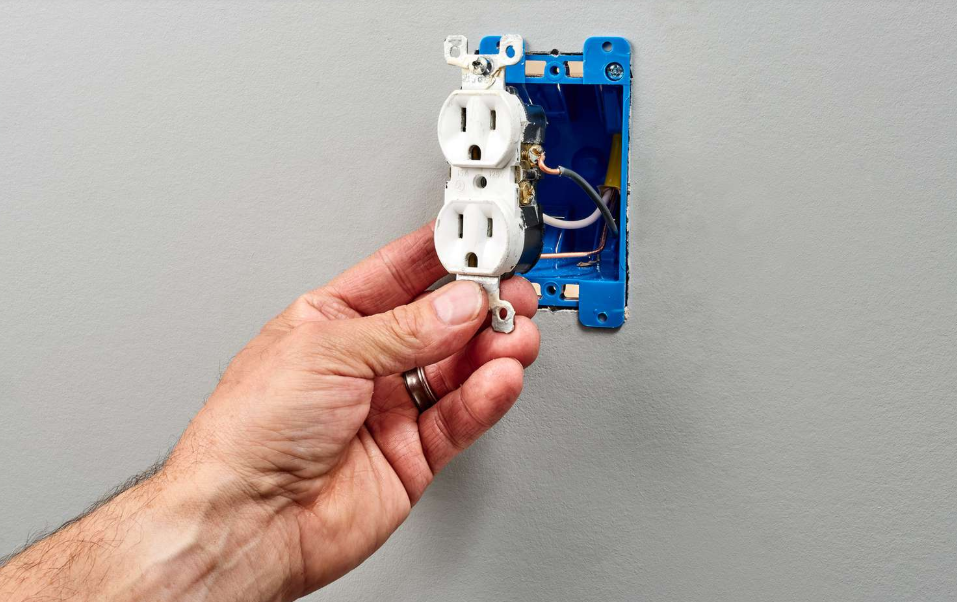
Step 5: Inspect the Existing Wiring
You should see black or red wires, which are hot; white wires, which are neutral; and a bare copper or green wire, which serves as the ground. Look closely for any signs of damage, such as browning, melted insulation, or brittle wires. If you notice aluminum wiring—typically dull silver in appearance rather than copper—stop immediately and call a licensed electrician, as this can cause electrical shock and damage to your home. These conditions require special handling and should not be part of a DIY project.
Step 6: Document the Wiring Configuration
Take a photo of the wiring before disconnecting. Most residential outlets are “wired through”, meaning the circuit continues to other outlets. The photo helps you reconnect everything correctly later.
Step 7: Disconnect the Wires
Loosen the terminal screws or use a release tool if wires are push-in connected. Then, gently remove wires without yanking or twisting.
Pro tip: Straighten wires and trim if damaged, then strip fresh insulation (about ¾ inch) for clean reattachment.
Step 8: Prepare the New Outlet
Before installation, make sure the new outlet matches the amperage and voltage rating of the existing one, typically 15A or 20A for most residential settings. If you’re upgrading to a GFCI, smart, or USB combo outlet, carefully review the manufacturer’s instructions. These outlets often have different wiring layouts or terminal placements compared to standard outlets, and correct installation is critical for both functionality and safety
Step 9: Connect the Wires to the New Outlet
Begin connecting the wires to your new outlet by matching them to the correct terminals. Attach the hot wire (typically black or red) to the brass screw, the neutral wire (white) to the silver screw, and the ground wire (bare copper or green) to the green screw. Bend each wire into a loop (clockwise) and wrap it securely around the terminal screw. Tighten firmly. Avoid backstabbing (inserting wires directly into push-in holes) unless your new outlet is rated for it, and the connections are tight.
Step 10: Secure the Outlet Back into the Box
Fold wires neatly behind the outlet without pinching. Align the outlet squarely and screw it into the box. Check that it’s flush with the wall—outlets sticking out or too deep can be a safety hazard or code violation.
Step 11: Install the Wall Plate
Once the outlet is securely in place, install the new or existing wall plate to cover the outlet box and complete the installation. Align the plate over the outlet and use a screwdriver to gently tighten the screw. Do not overtighten, as this can crack the plate or damage the outlet underneath.
Step 12: Turn the Power Back On
With your outlet fully installed and secured, it’s time to restore power. Head back to your electrical panel and flip the circuit breaker back to the ON position. This re-energizes the circuit and prepares the outlet for testing. Be sure all tools and wires are clear of the workspace before switching the power back on.
Step 13: Test the New Outlet
After restoring power, your final step is to confirm that everything is working correctly. Start by plugging in a small device, such as a lamp or phone charger, to check for power. For a more thorough verification, use an outlet tester to ensure the wiring is correct, or use a multimeter to confirm the voltage reads between 110 and 120 volts.
If you installed a GFCI outlet, press the TEST button to verify it automatically shuts off power as intended, and then press RESET to restore functionality. Completing this final step ensures your outlet is not only functional but also safe for everyday use.
Important Note: While replacing a standard electrical outlet may be a safe DIY project for confident homeowners, working with electricity always carries risks, including electric shock, fire, or code violations. If you’re unsure about any part of the process—or if you encounter damaged, outdated, or unfamiliar wiring—stop and consult a licensed electrician. It’s always better to be safe than sorry when dealing with electrical systems.
Do Electrical Outlets Go Bad?
Electrical outlets absolutely can go bad, and when they do, it’s not just an inconvenience. A failing outlet can be a sign of hidden electrical hazards that may lead to shock, equipment damage, or even fire.
Outlets are used multiple times a day, every day. Over time, the internal metal contacts lose tension, the plastic housing may degrade, and the connections can loosen due to expansion and contraction from heat. This wear compromises the outlet’s ability to maintain a safe, secure connection.
Most standard outlets last 15 to 20 years, while GFCI outlets can last around 15 to 25 years, depending on usage and environmental conditions. However, we’ve found that outlets exposed to frequent plugging/unplugging, heat, or moisture may fail much sooner.
Electrical outlets do wear out, and knowing when to replace them can prevent serious hazards. Don’t wait for sparks or failure—regularly inspect high-use outlets and consider updating older ones for added safety and energy savings.
Signs Your Electrical Outlet Has Gone Bad
Outlets are one of the most frequently used components in your home, but they’re also among the most overlooked—until something goes wrong. Catching the warning signs early can help prevent costly damage or dangerous hazards. Here’s what to watch for:
1. Loose or Wobbly Outlets
If plugs fall out easily or the outlet wiggles when touched, the internal contacts or mounting hardware may be worn out. This can cause arcing—where electricity jumps between contacts—which increases the risk of overheating and fire. A snug, firm fit is essential for safe connections. If your outlet feels loose, it’s time to replace it.
2. Burn Marks or Discoloration
Another sign that your electrical outlet has gone bad is when its color turns brown, black, or yellow, staining the outlet’s face or wall plate. These marks often signal overheating or short-circuiting. You may also notice a melted plastic smell, which indicates internal damage. Do not ignore signs of scorching. Turn off the breaker and stop using the outlet until it’s replaced or inspected by a professional.
3. Warm or Hot to the Touch
Outlets should never feel warm. Heat buildup often means loose wire connections, overloaded circuits, or outdated outlets not rated for current power demands.
4. Sparking or Buzzing Sounds
If you see sparks when plugging something in or hear a low buzzing or crackling noise, this points to poor connections or failing internal contacts. These sounds often precede electrical fires.
5. Outlet Doesn’t Work or Is Intermittent
If the outlet suddenly stops working—or only works part of the time—it may have loose wires, worn contacts, or internal corrosion. Rule out tripped breakers or GFCI resets first. If the issue persists, the outlet likely needs to be replaced.
6. Frequent Tripped Breakers or GFCI Resets
If an outlet constantly trips your circuit breaker or GFCI, it may be overloading the circuit or experiencing internal failure. Replacing the outlet could help, but ongoing issues may indicate a deeper wiring or load problem.
7. Physical Damage
Cracks, chips, or broken faceplates expose internal wiring, which can lead to electric shock or short-circuiting. Even cosmetic damage compromises outlet safety, as it may allow dust, moisture, or foreign objects to interfere with the electrical components.
8. You Smell Something Burning
If you smell burning plastic or a fishy odor coming from an outlet, it could be a sign of overheating, melting insulation, or an internal electrical failure. Shut off the breaker immediately and avoid using the outlet until it has been inspected or replaced by a licensed electrician.
How to Test an Electrical Outlet with a Multimeter
If you want to check whether an outlet is working properly, a multimeter is one of the most reliable tools you can use. Here’s how to test an electrical outlet with a multimeter, step by step:
- Set Your Multimeter to AC Voltage: First, make sure your multimeter is turned on and set to measure AC voltage (V~)—that’s what your standard home outlets use.
- Understand the Outlet Slots: Look at the outlet: it has two vertical slots. The larger slot is neutral, and the smaller one is hot (live). There’s usually a round hole underneath for the ground, but you won’t need that for this basic test.
- Insert the Probes: Take the black probe and insert it into the larger (neutral) slot. Then take the red probe and insert it into the smaller (hot) slot.
- Read the Display: Your multimeter should show a reading somewhere between 110 and 120 volts. That means the outlet is functioning as expected.
- If Something Looks Off: If you don’t get a reading at all, the circuit breaker may be tripped. Go check your breaker panel and reset it if necessary. If the voltage is unusually low or high, there could be a wiring issue. Still no reading after resetting the breaker? That’s a strong indication of a deeper electrical problem, and you should contact a licensed electrician to inspect it further.
How to Add an Electrical Outlet
Adding an electrical outlet can improve convenience, eliminate extension cord clutter, and support new appliances or devices. Here’s a step-by-step guide on how to add an electrical outlet:
Step 1: Plan the Location
The first step in adding an electrical outlet is to carefully choose where it will go. Use a stud finder to locate and avoid any structural beams, plumbing, or existing wiring inside the wall. Select a spot at a standard outlet height—typically between 12 and 18 inches from the floor—to match other outlets in the room. Confirm that nearby outlets are on the same circuit and have available capacity.
If you’re unsure how many outlets a circuit can handle, consult an electrician. Overloading a circuit can increase fire risk.
Step 2: Turn Off the Power at the Breaker
Before starting any wiring work, locate the circuit breaker that controls the outlet or circuit you plan to tap into. Turn it off at the panel, then use a non-contact voltage tester to double-check that there is no power flowing to the wires. This step is critical for your safety and should never be skipped when adding an electrical outlet.
Step 3: Cut the Opening for the New Box
Once you’ve planned the outlet location, use a pencil to mark the area on the drywall where the electrical box will go. Using a drywall saw or oscillating tool, carefully cut along the outline to create a hole. Make sure the opening fits your old work or remodel-style electrical box snugly so that it mounts securely.
Step 4: Run New Romex Cable
This step depends on how you’re adding the outlet. If you’re tapping into an existing outlet, first make sure the power is off, then remove the existing outlet and carefully fish the Romex cable from your newly cut hole to the source outlet’s electrical box. You may need a fish tape or cable puller to guide the wire through the wall cavity.
Be careful not to damage insulation or other wires when fishing cables. Damaging wire insulation can expose live wires, increasing the risk of shock or fire. Tugging too hard may also loosen or cut existing wires hidden in the wall. Always guide cables slowly and use the right tools to protect your home’s wiring system.
Step 5: Install the New Outlet Box
Feed your cable into the electrical box through a clamp or knockout tab. Make sure the cable is secure and won’t shift as you work. Insert the box into the drywall opening and tighten the mounting tabs or screws until it sits flush and firmly in place.
Step 6: Wire the New Outlet
Once the box is installed, it’s time to connect the wires. Strip about ¾ inch of insulation from the ends of each wire using a wire stripper. Attach the black (hot) wire to the brass screw, the white (neutral) wire to the silver screw, and the bare copper (ground) wire to the green screw. Tighten all terminal screws firmly, then gently fold the wires back into the box.
Step 7: Wire to the Power Source
Now it’s time to complete the connection to the power source. First, ensure the power is off and verify it with a voltage tester. At the source outlet or junction box, splice the new wires into the existing ones using wire nuts: hot to hot, neutral to neutral, and ground to ground. Use electrical tape to secure connections if needed. Once all connections are made, fold the wires neatly back into the box and reassemble the outlet or cover.
Step 8: Test Everything
Turn the power back on at the breaker. Use an outlet tester or multimeter to confirm your new outlet works and is wired correctly. Testing is the final and most important step in confirming a successful and safe installation as you complete the process of adding an electrical outlet.
How to Move an Electrical Outlet
Sometimes an outlet just isn’t in the right spot—whether you’re rearranging a room, installing new cabinetry, or improving functionality. Moving an electrical outlet is doable for confident DIYers, but it involves cutting into drywall, extending wiring, and ensuring everything meets electrical code. Here’s how to move an outlet step-by-step while staying safe and effective:
Step 1: Turn Off the Power at the Breaker
Start by shutting off the power to the circuit you’ll be working on. Head to your breaker panel and flip the appropriate switch to the OFF position. Then use a voltage tester to confirm there is no power at the outlet. This step is absolutely essential and non-negotiable when working with electrical components.
Step 2: Remove the Existing Outlet
Next, unscrew and remove the faceplate from the existing outlet. Carefully unscrew the outlet from the electrical box and gently pull it forward. Before disconnecting any wires, take a clear photo of the wiring configuration so you can reference it later. Once documented, disconnect the wires and remove the outlet box from the wall.
Step 3: Cut the Opening in the New Location
Choose your new outlet location and use a stud finder to avoid structural framing or obstructions inside the wall. Mark the placement, trace the outline of your remodel box, and use a drywall saw to cut the hole. Be sure the new opening is level and follows standard outlet height, which is typically 12 to 18 inches from the floor.
Step 4: Extend the Wiring (If Needed)
If the wire isn’t long enough to reach the new box, use Romex cable of the same gauge. All splices must be made inside an accessible junction box, not buried inside the wall. Use UL-listed wire nuts and wrap the connections with electrical tape. Be sure to label the junction box if required by local code. If you’re at all uncertain about extending the wiring properly, this is a good time to call a licensed electrician.
Step 5: Install the New Outlet Box
Feed the wires into the remodel box through the built-in cable clamp or knockout tab. Then insert the box into the new hole and tighten the mounting tabs or clamps so it sits flush and secure against the wall surface.
Step 6: Wire and Mount the New Outlet
Strip fresh wire ends if needed, then connect the hot wire to the brass screw, the neutral wire to the silver screw, and the ground wire to the green screw. Carefully fold the wires into the box, attach the outlet, and finish by securing the faceplate.
Step 7: Patch the Old Opening (Optional)
Once the new outlet is installed, you may want to patch the hole where the old one was removed. Use a drywall repair kit or patch panel to cover the opening. Finish with paint for a seamless look.
Step 8: Turn Power Back On and Test
Head back to the breaker panel and turn the power back on. Use an outlet tester or multimeter to verify the new outlet works correctly. Check that the voltage reads between 110 and 120 volts, ensure there are no reversed wires or grounding issues, and verify that the outlet is secure and cool to the touch after use.
Warnings and Common Mistakes When Changing an Electrical Outlet
Swapping out a basic outlet might seem like a small project—but it comes with real risks if not done properly. Here are the top things to watch out for:
Forgetting to Turn Off Power at the Breaker
This is the most dangerous and most common mistake. Simply flipping the wall switch is not enough—you must shut off the power at the breaker and confirm it’s off with a voltage tester. Working on a live outlet puts you at risk of severe electric shock.
Not Testing the Circuit Before Starting
Even after flipping the breaker, you need to use a non-contact voltage tester or multimeter to make sure no electricity is flowing to the outlet. A mislabeled breaker panel or shared circuits could leave the wires live without your knowledge.
Reversing Hot and Neutral Wires
This happens more often than you’d think. Reversing the hot (black) and neutral (white) wires may not stop the outlet from working, but it creates a dangerous shock hazard for anything plugged into it. The hot wire goes to the brass screw, neutral to the silver, and ground to the green.
Using the Wrong Type of Outlet
Outlets come in different types and amperages. Using a 15A outlet on a 20A circuit or replacing a required GFCI with a standard outlet can put your home out of code and at risk, especially in kitchens, bathrooms, and outdoor areas.
Backstabbing Wires into Push-In Holes
Budget outlets often allow “backstabbing” (pushing wires into spring-loaded holes instead of securing under screws). While fast, this method is not as reliable, and over time, those connections can loosen, arc, and overheat. Use the side terminal screws instead and secure wires tightly.
Leaving Too Much Bare Wire Exposed
If there’s too much exposed copper outside the terminal screw, it could touch the metal box or another wire, causing a short circuit or fire. Strip only what’s needed—typically about ¾ inch.
Overcrowding the Outlet Box
Too many wires stuffed into one box can lead to overheating or make it difficult to install safely. Always check box fill limits (required by NEC) to avoid violating code.
Ignoring Aluminum or Damaged Wiring
If your wires are silvery gray (aluminum) or brittle, burnt, or frayed, stop immediately. Aluminum wiring requires special connectors and procedures. Damaged wires must be cut back or replaced by a pro.
No Ground Connection
All outlets should be grounded for safety. If your outlet box or wiring lacks a ground, don’t just “pretend it’s fine.” Either use a GFCI outlet with a “No Equipment Ground” label (if allowed by code) or consult an electrician.
Skipping the Final Test
After installation, always test the outlet using a plug-in tester to check for correct wiring configuration, a multimeter to confirm the voltage reads between 110 and 120 volts, and if you’ve installed a GFCI outlet, press the TEST button to ensure it shuts off power as expected, then RESET to restore functionality.
If anything looks wrong—burnt wires, odd smells, aluminum wiring, or ungrounded systems—don’t take chances. Call a licensed electrician. Your safety (and your home’s wiring) isn’t worth the risk.
How Much Does It Cost to Replace an Electrical Outlet?
If you’re thinking about replacing an outlet, you might be wondering what kind of costs to expect. On average, replacing a single outlet professionally costs around $175, with most jobs falling between $125 and $200, depending on the outlet type and how complex the installation is.
When Not to DIY
If you notice any of the following, stop and call a licensed electrician:
Wires are burned past the terminal ends
This means the damage may extend deep into the wall or circuit, and simply replacing the outlet won’t solve the underlying hazard.
Plastic outlet box is melted or damaged
A melted box can’t safely hold a new outlet and may be a sign of severe overheating or arcing behind the wall.
Breaker trips immediately after turning power back on
This likely indicates a short circuit or wiring issue that needs professional diagnosis to prevent shock or fire.
There are multiple burnt outlets or flickering lights in the same area
This suggests a larger problem with the circuit or panel, such as overloading or failing connections, not just one faulty outlet.
Call a Pro When…
You’re unsure about how the wires connect.
Making a wrong connection can result in electric shock, damaged devices, or a code violation, so it’s best to let a licensed electrician handle it.
The outlet is in a kitchen, bathroom, garage, or outdoor space.
These areas are considered high-risk due to moisture exposure and are required by code to have GFCI protection—something a professional can ensure is done correctly.
There’s no ground wire in the outlet box.
Ungrounded systems require special handling, GFCI substitutes, or full grounding upgrades to comply with code and protect your devices and safety.
You discover aluminum wiring.
Aluminum wiring, common in homes built before the 1970s, expands and contracts with heat and must be treated with approved connectors and materials to avoid fire hazards.
The breaker trips as soon as power is restored.
This usually indicates a short circuit, overloaded circuit, or faulty wiring—all of which need professional troubleshooting and repairs.
You see melted plastic, scorch marks, or smell burning.
These are strong indicators of overheating, arcing, or a serious internal wiring issue that could lead to fire if left unresolved. Always call a professional in these situations.
FAQs
Can I replace the outlet myself?
Yes—if it’s a simple, like-for-like replacement and you’re comfortable working with electrical wiring. You must shut off the power at the breaker and follow all safety steps. However, while DIY can be satisfying, it also comes with real risks. For anything involving damaged wiring, GFCI upgrades, or aluminum wires, it’s safer to call a licensed electrician.
Is it safe to replace a 2-prong outlet with a 3-prong outlet?
Only if the outlet is properly grounded. If the circuit doesn’t have a ground wire, you must either install a GFCI outlet labeled “No Equipment Ground” or rewire the circuit to include grounding. Never install a 3-prong outlet without addressing grounding—it’s a shock and code violation risk.
Do smart outlets save energy?
Yes—when used correctly. Smart outlets can reduce phantom loads by turning off electronics that draw power even when idle. They also help monitor and schedule usage, supporting better energy habits.
Changing an electrical outlet might seem small, but it’s a powerful way to improve your home’s safety, function, and energy efficiency. Whether you’re fixing an issue, upgrading to smarter tech, or making room for how you really live, these everyday improvements add up. Santanna makes it simple. With our Unlimited Energy plan, you can protect your peace of mind all year long—no change to your supply charge, no surprises.* Get started today.
*Restrictions apply. Enrollment based upon program eligibility. Customers using more than 125% of normal monthly usage as determined by Santanna may be required to switch plans.
Tyler is an experienced energy professional, having worked for Santanna Energy Services, for the past four years. He is passionate about renewable energy and believes that diversifying the energy grid is the key to a sustainable future. Tyler is dedicated to supplying consumers with the best possible energy solutions and works diligently to make sure that Santanna can deliver the highest quality service.