How to Winterize Your Home

by Tyler Castle
17.4 min read

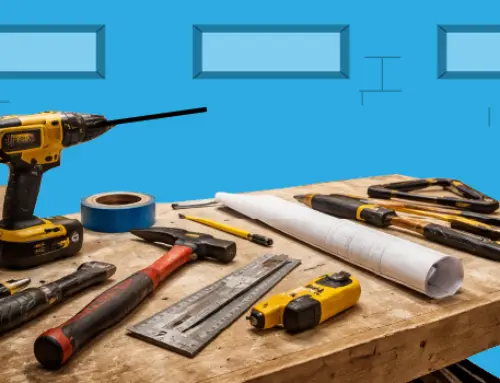
As the weather turns, it's important to properly prepare and "winterize" your home before winter is in full swing. Similarly, as the use of your heating system increases, it's important to know just exactly how to winterize your home to ensure you're ready. We'll touch on the most important things you should prepare to protect your home from the dangers of winter.
Key Points of This Article:
- Winterizing your home helps keep it warm, safe, and energy efficient while preventing costly damage during cold weather.
- The best time to winterize is late summer or early fall so repairs and preparations can be completed before temperatures drop.
- Key tasks include sealing air leaks, protecting pipes, cleaning gutters, adding insulation, servicing heating systems, and preparing both indoor and outdoor areas.
- Additional steps like testing detectors, creating an emergency kit, installing storm windows, and maintaining equipment help ensure safety and reduce winter energy costs.
What is Winterization?
You might have heard the term "winterization" before but what does it mean? Simply enough, "winterization" is the process of preparing your home for the winter! Winterizing your home isn't scary when you have the right tools and tips. The ultimate goal of winterizing your home is to make improvements to your abode to ensure your space stays warm and safe, so you can avoid rising energy costs during the colder months.
Winterizing your home can also prevent potential damage to your home's structure and systems, saving you from costly repairs in the future. Some common areas of the home that may require winterization include windows, doors, roofs, gutters, pipes, and heating systems.
When Should I Winterize My Home?
The best time to winterize your home is in the late summer or early fall before the temperature drops significantly and consistently. Trust us, you don't want to be out in the dead of winter fixing holes in your roof! This will give you enough time to complete all necessary tasks and make repairs. It's important not to wait until the last minute, as some tasks may require professional services.
Winterizing Your Home Checklist
We've compiled a complete winterizing your home checklist to help you with this process. Protect your home from the elements with these simple items that make the process of winterizing your home a snap:
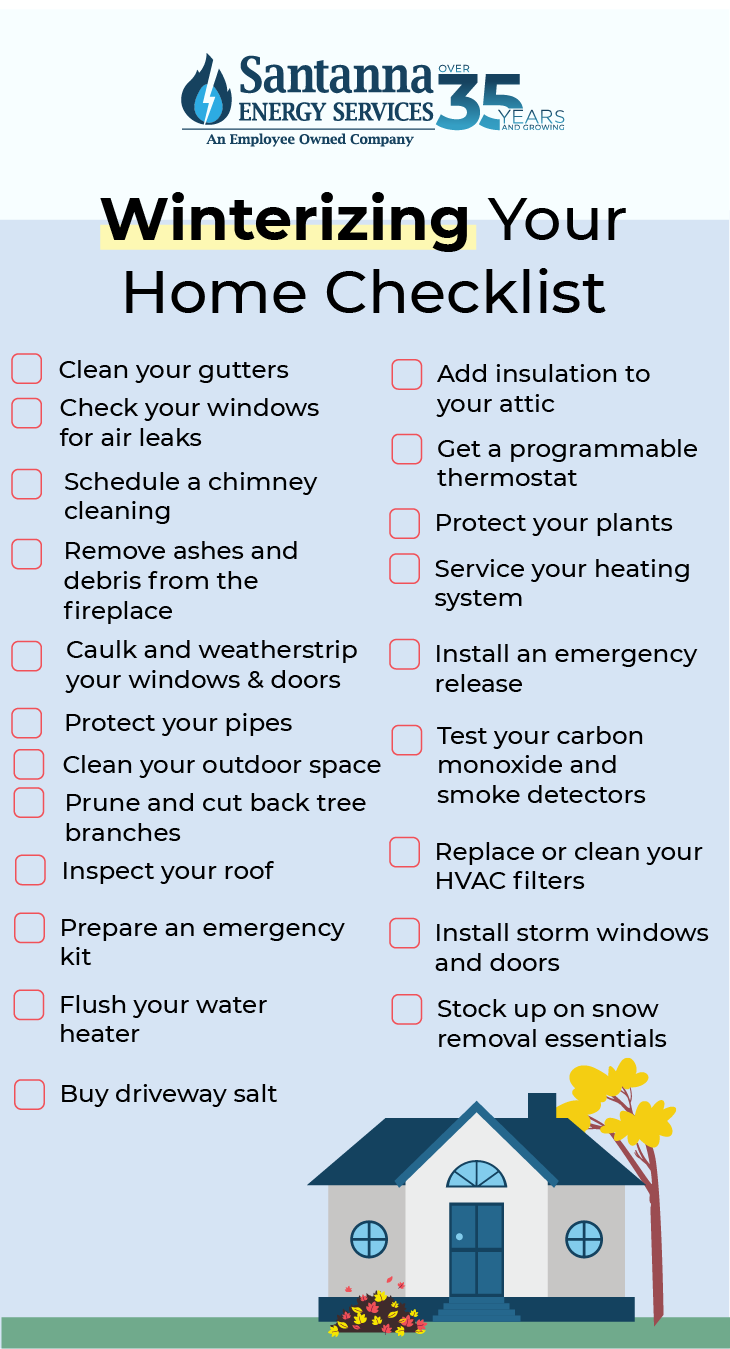
- Clean your gutters
- Check your windows for air leaks
- Schedule a chimney cleaning
- Caulk and weatherstrip
- Protect your pipes
- Clean up your outdoor space
- Add insulation to your attic
- Get a programmable thermostat
- Protect your plants
- Service your heating system
- Install an emergency release
- Test your carbon monoxide and smoke detectors
- Replace or clean your HVAC filters
- Prepare an emergency kit
- Install storm windows and doors
- Flush your water heater
- Stock up on snow removal essentials
- Buy driveway salt
How to Winterize Your Home
Winterizing your home is a process you can complete in stages. Start by checking the exterior of your home. Look for cracks and gaps in windows, walls, and doors. Next, prepare your yard for the seasonal change by winterizing your sprinklers, lawn, and trees. Lastly, head inside to check your insulation, windows, and heating systems.
Of course, this is just the tip of the iceberg when it comes to how to winterize your home. Here's your complete list:
1. Clean your Gutters
Gutters filled with leaves, debris, and other buildup can become blocked, leading to water backing up onto your roof or leaking into your home. This can lead to water damage and mold growth within your home's interior, weakening its structure and requiring future repairs.
Neglecting to clean your gutters can lead to the accumulation of ice and snow, potentially causing damage. The best time to clean your gutters is in the late fall, right before temperatures drop consistently.
Pro Tip: Check for leaks after removing debris by flushing the gutters with water and watching for proper flow and leaks. Fix any leaks with sealant or replace damaged sections.
2. Protect Your Pipes
Before winter comes, it's important to protect your pipes from freezing and bursting. When water freezes inside a pipe, it expands and puts pressure on the walls of the pipes; this causes pipes to burst and can lead to water damage in your home and costly repairs. But how do you know if your pipes have burst? Check for signs of standing or leaking water, unusual sounds, colors, or smells from water sources, and lower water pressure.
The best way to prevent your pipes from bursting is to insulate them in unheated or exposed areas such as attics, basements, and crawl spaces. Be sure to drain your pipes and seal any gaps you see when you inspect them. Lastly, it is recommended that you keep your house's temperature to at least 50 degrees to prevent your pipes from freezing and bursting.
Pro Tip: Insulate exposed pipes with foam pipe insulation or heat tape, especially in unheated areas like basements, crawl spaces, and garages.
3. Check Your Chimney
Checking your chimney is an essential part of winterizing your home. The last thing you want during the colder months is for your fireplace to become a safety hazard. A professional chimney sweep can check for structural issues or cracks and can remove any creosote buildup from your chimney, which can be highly flammable and cause a fire. A clean chimney is a great way to warm up and kick off the winter season in a cozy way!
Pro Tip: Remove ashes and debris from the fireplace or stove's firebox. Dispose of them in a metal container and keep them away from flammable materials.
4. Seal Your Doors and Windows
By caulking or weatherstripping any cracks or gaps in your doors and windows, you can prevent cold air from entering and warm air from escaping your home. This will keep you more comfortable and save on heating costs.
It's a simple and cost-effective way to make your home more energy efficient. Check the seals and for cracks around doors and windows on the inside of your home as well, as these can also contribute to drafts and heat loss.
Pro Tip: Consider adding film over windows for added insulation and heat absorption!
5. Prepare Your Outdoor Space
Winterizing your outdoor space is just as important as preparing the interior of your home for the colder months. This includes storing or covering outdoor furniture and decorations to protect them from the elements. If you have a patio or deck, consider sealing it to prevent damage from snow and ice.
Don't forget to winterize your lawn for the chilly season. You can easily prepare your lawn by raking leaves, mowing it to a short length to prevent matting, and adding winterizing fertilizer with a high potassium content to strengthen the grass and promote root growth.
If you have a pool, don't leave it uncovered all winter. This can make pool cleaning more difficult as you prepare it for the following summer. Leaving your pool uncovered can also be a safety hazard. Winterize your pool by adding necessary chemicals, lowering the water level, and adding a pool shock treatment to kill any remaining bacteria and contaminants.
Pro Tip: Prune and cut back tree branches! Removing dead, damaged, or weak branches helps prevent them from falling under the weight of snow or ice which can be a hazard to people and property.
6. Prepare Your Roof and Attic
Properly preparing your roof and attic is crucial for winterizing your home. Start by scheduling a roof inspection to check for any damage or missing shingles that could lead to leaks during heavy snowfall. You should also check for adequate insulation to prevent heat loss. Seal any gaps or cracks in the attic's floor, walls, or ceiling to prevent warm air from escaping into the attic. Pay close attention to areas around electrical boxes, plumbing, and chimneys.
Pro Tip: In regions prone to ice storms, consider installing an ice and water shield to prevent water from seeping under roof shingles for extra protection.
7. Add Extra Insulation to Your Attic
Heat naturally rises, and without proper insulation, it escapes through the attic, forcing your heating system to work harder. Winterizing your home with extra insulation keeps the warmth inside. Poor attic insulation can create temperature imbalances on the roof, leading to snow melting and refreezing at the edges and forming destructive ice dams.
Pro Tip: When adding attic insulation, don't forget to insulate and seal the attic hatch or pull-down stairs! This is a common weak spot where heat escapes.
8. Get a Programmable Thermostat
Installing a programmable thermostat during your home winterization process can help you save on heating bills. You can set it to automatically change the temperature based on your preferred schedule. They even come equipped with eco-friendly temperature settings that help reduce energy consumption during the toughest parts of the winter.
Pro Tip: During the winter, set your thermostat to 68°F when home and lower at night or when away to maximize savings.
9. Protect Your Plants
Bring as many delicate plants as you can inside to shield them from frost and cold winds. If needed, place them near a sunny window or under grow lights. For outside plants, use mulch and burlap wraps around roots to keep them from freezing.
Pro Tip: Water plants before a freeze—moist soil retains heat better than dry soil.
10. Install an Emergency Release
Winterizing your home isn't complete without installing an emergency release, especially if you experience consistently heavy snow. Emergency releases ensure quick access to frozen or stuck doors in case of a fire, gas leak, or medical emergency during winter storms.
Pro Tip: Apply silicone spray to door tracks and weatherstripping to prevent freezing shut.
11. Service Your Heating System
Have a professional inspect your heating system, ensuring it runs efficiently all winter. Regular maintenance prevents breakdowns and extends the unit's lifespan. Cleaning and tuning up your furnace or heat pump helps prevent overworking the system, which can reduce utility costs. Servicing your heating system helps prevent costly repairs when winter puts strain on it.
Pro Tip: Replace furnace filters every 1-3 months to improve airflow and reduce energy costs
12. Test Carbon Monoxide & Smoke Detectors
Heating systems, fireplaces, and gas appliances are used more in winter, increasing the risk of CO leaks. While you winterize your home, replace batteries and test all detectors to ensure they're functioning properly. A working smoke detector provides early warning for household fires that can occur during any season. Lastly, batteries can weaken over time, especially in cold conditions. Keep an extra eye on the detectors in your attic and basement while you winterize your home.
Pro Tip: Install additional detectors near bedrooms and common areas for extra safety.
13. Replace or Clean HVAC Filters
HVAC filters get dirty and need to be replaced like anything else. Dirty or blocked filters will make your system work harder, increasing energy costs, reducing air quality, and causing malfunctions or costly repairs. Swap out disposable filters or clean reusable ones before the cold sets in.
Pro Tip: Choose high-efficiency pleated filters for better air filtration and fewer allergens.
14. Prepare an Emergency Kit
Create an emergency kit before harsh winter conditions set in. Stock up on essentials, including flashlights, batteries, blankets, bottled water, non-perishable food, a first-aid kit, and a battery-powered radio in case of a horrible snowstorm or power outage.
Pro Tip: Keep a portable power bank charged for your phone in case of extended outages.
15. Install Storm Windows & Doors
Storm doors add an extra barrier against cold air, reducing drafts and improving insulation. They also help cut down on energy costs by keeping heat inside. Adding storm doors to your home winterization checklist helps maintain consistent indoor temperatures, making your home feel warmer. Storm doors shield your main door from rain, snow, and ice, preventing warping or damage.
Pro Tip: If storm windows are too costly, use plastic window film as a temporary and budget-friendly insulation option.
16. Flush Your Water Heater
Don't forget to flush your water heater when you winterize your home. Over time, sediment buildup can accumulate at the bottom of the tank, reducing heating efficiency and forcing the system to work harder to provide hot water. In colder months, when demand for hot water increases, a poorly maintained water heater may struggle to keep up, leading to higher energy bills and inconsistent water temperatures.
Pro Tip: Set your water heater to 120°F—hot enough for comfort but safe enough to prevent scalding and save energy.
17. Stock Up on Snow Removal Essentials
Buy snow shovels, a snow blower, and ice melt before the first big snowfall. Keeping pathways and driveways clear prevents accidents. Early preparation also prevents last-minute scrambles to find supplies, as demand for snow removal products often spikes after the first major snowfall.
Pro Tip: Use pet-safe ice melt to avoid harming animals and damaging concrete.
18. Buy Driveway Salt
Ice can quickly form after snow melts and freezes, creating hazardous conditions that are difficult to manage without a de-icing solution. Ice storms can cause salt shortages, so buy salt early to prevent slipping hazards on driveways and sidewalks. Applying salt before a storm or immediately after snowfall can make snow removal easier and maintain safer walking and driving conditions around your home.
Pro Tip: Sand or kitty litter can be used as an alternative to salt to add traction on icy surfaces.
How to Winterize Home Plumbing
Winterizing your home plumbing can be a big job. These simple steps help protect your plumbing from costly winter damage:
- Know Your Main Water Shut-Off: Mark your main shut-off valve so you can quickly stop water flow in an emergency. After shutting off the valve, open faucets to drain pipes and relieve pressure.
- Insulate Pipes to Prevent Freezing: Use foam insulation tubes on exposed pipes, especially in unheated areas like basements and crawl spaces. Measure pipe diameters before purchasing to get the right fit.
- Disconnect Outdoor Hoses & Protect Faucets: Drain and store garden hoses. If your home has an outdoor faucet shut-off, turn it off and drain any remaining water.
- Winterize Your Sprinkler System: Shut off and drain sprinklers before temperatures drop. Hire a pro to blow out excess water to prevent underground pipe damage.
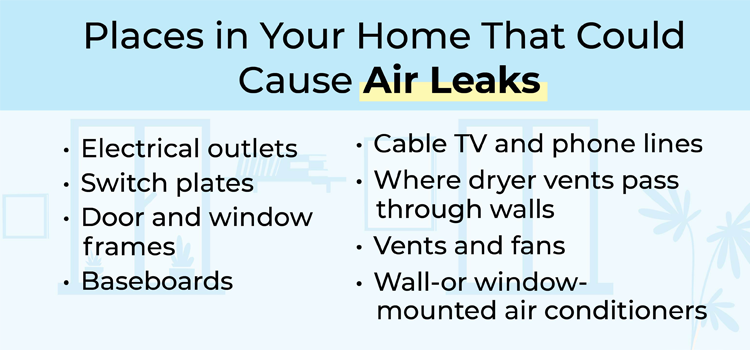
- Seal Air Leaks to Stop Freezing Drafts: Check for gaps around doors, windows, electrical outlets, and plumbing penetrations. Use weatherproof caulking or foam insulation to seal leaks.
- Prevent Frozen Pipes While Away: When leaving home for an extended period, keep your thermostat at 55°F or higher. Open cabinet doors under sinks to let warm air circulate.
Cost of Winterizing a House
Homeowners typically spend $200 to $1,000 on basic winterization, while more extensive preparations can cost anywhere from $1,000 to $5,000 or higher. Here's a breakdown of the cost of the most basic to complicated home winterization tasks:
Cost of Winterizing a Home
| Winterization Task | Cost Range | Potential Energy Savings |
|---|---|---|
| Attic Insulation | $1,500 – $3,500 | Up to 15% |
| Wall Insulation | $1,000 – $4,000 | Up to 12% |
| Basement Insulation | $1,500 – $2,500 | Up to 11% |
| Weatherstripping (DIY) | $20 – $100 | Up to 10% |
| Weatherstripping (Professional) | $200 – $600 | Up to 10% |
| HVAC System Service | $80 – $200 | Up to 15% |
| Chimney Cleaning & Inspection | $150 – $350 | Ensures heating safety & efficiency |
| Gutter Cleaning | $100 – $250 | Prevents water damage & energy loss |
| Pipe Insulation (DIY) | $50 – $200 | Up to 3% on water heating |
| Pipe Insulation (Professional) | $200 – $1,000 | Up to 3% on water heating |
| Plastic Window Film | $20 – $100 | Up to 14% |
| Storm Windows | $200 – $800 per window | Up to 20% |
| Roof Inspection | $100 – $300 | Prevents insulation damage |
| Minor Roof Repairs | $150 – $1,500 | Prevents insulation damage |
| Professional Energy Audit | $200 – $700 | 5-30% based on improvements |
DIY vs. Professional Winterization: What's Worth Paying For?
When it comes to winterizing your home, there are certain tasks you can do yourself in a few easy steps while other tasks might require professional help. But which ones should you DIY, and which ones should you call for backup? Let's break it down:
1. Attic Insulation
Attic insulation helps reduce heat loss and improve energy efficiency, making the home warmer and lowering heating bills. Professional installation can ensure proper coverage, maximizing energy savings and home comfort.
DIY Difficulty: Moderate – Can be done by experienced DIYers but requires proper materials and installation techniques.
Worth Hiring a Pro? Yes – A professional ensures proper insulation, avoiding heat loss and inefficiencies.
2. Wall Insulation
Wall insulation improves indoor comfort and lowers heating costs by keeping warm air inside. Professionals use specialized techniques to fully insulate walls, which improves efficiency.
DIY Difficulty: Difficult – Requires opening walls and proper insulation placement.
Worth Hiring a Pro? Yes – Professionals ensure full wall coverage and maximum insulation effectiveness.
3. Basement Insulation
Basement insulation prevents heat loss in basements, reducing drafts and improving indoor warmth. Experts ensure even coverage, preventing air leaks and improving insulation effectiveness.
DIY Difficulty: Difficult – Requires precise installation to avoid gaps.
Worth Hiring a Pro? Yes – Professionals ensure proper insulation without missing key areas.
4. Weatherstripping
Weatherstripping is affordable and easy to apply with minimal tools, making it a cost-effective solution for reducing drafts. While various types of weatherstripping materials are needed for certain door types, weatherstripping can be done within an hour.
DIY Difficulty: Easy – Can be done in an afternoon with self-adhesive strips.
Worth Hiring a Pro? No, unless sealing is complex or multiple areas need attention.
5. HVAC System Service
Servicing your HVAC system can optimize system performance, improve efficiency, and prevent major repairs. Depending on the service, these adjustments often require professional tools and knowledge, and a botched DIY service may lead to costly breakdowns if not done correctly.
DIY Difficulty: Difficult – Requires Professional Service
Worth Hiring a Pro? Yes, to ensure efficiency and safety and prevent system failures.
6. Chimney Cleaning & Inspection
Cleaning your chimney prevents dangerous creosote buildup, improving safety and efficiency. A proper chimney cleaning is best handled by certified chimney sweeps. Improper cleaning can lead to fire hazards and carbon monoxide buildup.
DIY Difficulty: Difficult – Requires Professional Service
Worth Hiring a Pro? Yes, for fire safety and proper maintenance.
7. Gutter Cleaning
Gutter cleaning can be done if the home is single-story, and ladders are used safely. If you have a multi-story home, gutter cleaning can become complicated, and improper cleaning can cause issues. Professionals ensure thorough cleaning, helping prevent issues like water damage and ice dams.
DIY Difficulty: Difficult for multi-story homes
Worth Hiring a Pro? Yes, for multi-story homes or when dealing with heavy debris.
8. Pipe Insulation
Pipe insulation is affordable and easy to do, reducing the risk of frozen pipes. A DIY solution can be as simple as wrapping your pipes in thick blankets.
DIY Difficulty: Moderate – Simple for exposed pipes but tricky for hidden ones.
Worth Hiring a Pro? Maybe, especially for hard-to-reach pipes.
10. Storm Windows
Installing storm doors can be done by experienced DIYers, but the process can be difficult and time-consuming to install properly. Professionally installed storm windows provide maximum energy savings.
DIY Difficulty: Difficult – Requires precise installation.
Worth Hiring a Pro? Yes, for best energy efficiency.
Frequently Asked Questions
Are there tax credits for winterization upgrades?
Homeowners who pay federal income taxes may qualify for a tax credit of up to $1,200 for weatherization upgrades. The 25C tax credit applies to improvements made to an existing primary residence. It cannot be used for rental properties or secondary homes. Renters are not eligible, and landlords cannot claim the credit unless they personally live in the home as their primary residence.
What's the fastest way to winterize a home?
Conducting a home energy audit is a practical starting point and can identify areas where energy efficiency can be improved. This allows for targeted actions such as sealing air leaks and adding insulation.
Can winterizing really lower energy bills?
Yes, winterizing your home can lead to significant energy savings. Implementing measures like covering drafty windows with plastic film and installing tight-fitting, insulating drapes can reduce heat loss and lower heating costs.
How do I prevent drafts without replacing windows?
To prevent drafts during winter without replacing windows, use a heavy-duty plastic sheet on a frame or tape plastic film to the inside of window frames. Make sure the plastic is securely sealed to the frame to help reduce air infiltration. Additionally, installing tight-fitting, insulating drapes or shades on drafty windows can further improve energy efficiency.
Santanna Energy Services is a supplier of renewable energy solutions in the United States, providing services to Illinois, Indiana, Pennsylvania, Michigan, and Ohio. We provide a wide range of energy services and products to meet the needs of both residential and small business customers. Our mission is to provide innovative and cost-effective energy solutions that will help our customers achieve their energy goals. With over 35 years of experience, we are committed to creating life-long relationships by providing quality service to customers, communities, and employees.
Tyler is an experienced energy professional, having worked for Santanna Energy Services, for the past four years. He is passionate about renewable energy and believes that diversifying the energy grid is the key to a sustainable future. Tyler is dedicated to supplying consumers with the best possible energy solutions and works diligently to make sure that Santanna can deliver the highest quality service.