When Electrical Outlets Should Be Fixed and Replaced
by Tyler Castle
13.8 min read
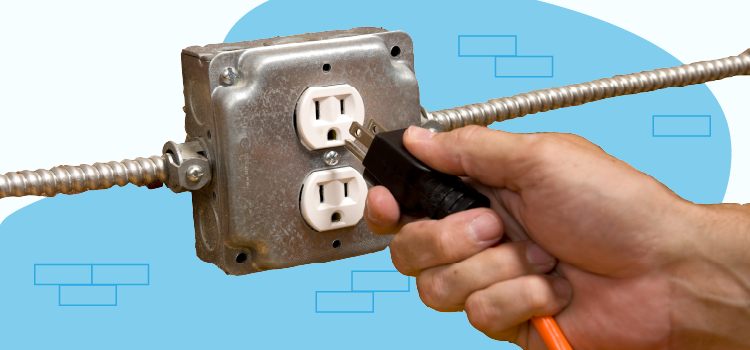
Electrical outlets are essential fixtures in every home, but over time, they can develop issues like looseness, wear, or even safety hazards that require attention. Fixing an electrical outlet promptly can prevent bigger problems down the road, ensuring the safety of your home and family.
If you’re wondering when your electrical outlets should be fixed or replaced, you’ve come to the right blog! We’ll cover everything you need to know about outlet replacement, cost, when it’s time for a fix.
Electric Outlets Should Be Fixed When…
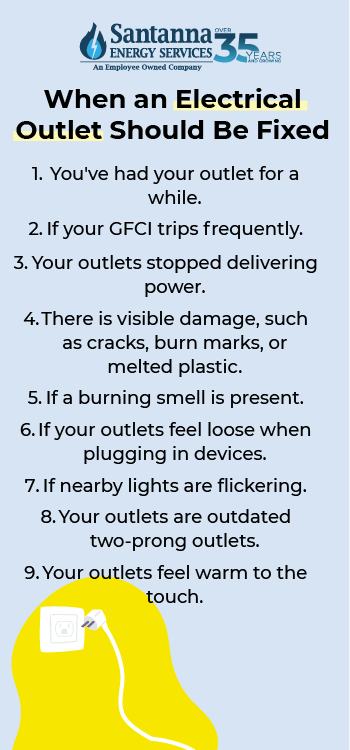
A malfunctioning outlet shouldn’t be taken lightly. Leaving a damaged outlet or outlet that should be fixed unattended can lead to electrical hazards, energy waste, and damage to your existing appliances. Here are some of the most common signs your outlet should be fixed:
- You’ve had your outlet for a while. Standard outlets typically last 15 to 20 years, while GFCI outlets can last around 15 to 25 years. If you haven’t replaced your outlet in a while, you can check its condition using a simple outlet tester.
- If your GFCI trips frequently. A GFCI is a quick-acting circuit breaker that shuts off electric power almost instantly if it detects a ground fault, helping to prevent electric shock. If this part of your outlet continuously shuts off your appliance, this could be a sign your outlet is faulty and needs an inspection.
- Your outlets stopped delivering power. This may indicate internal wiring issues that need immediate attention.
- There is visible damage, such as cracks, burn marks, or melted plastic. This commonly signals that your electrical outlet is compromised and should be fixed.
- If a burning smell is present, this could indicate overheating or an impending short circuit, posing a serious fire hazard. Be extra careful around an outlet with a burning smell; this could lead to electric shock if you choose to plug in an appliance.
- If your outlets feel loose when plugging in devices, this is a sign your electrical outlets should be fixed. A loose outlet can increase the risk of electric arcing, electrical shock, and potential damage to wiring.
- If nearby lights are flickering, this can suggest a wiring issue within the outlet that needs to be addressed.
- Your outlets are outdated two-prong outlets. Two-prong (mostly found in older homes) lack grounding and should be upgraded for safety and overall efficiency.
- Your outlets feel warm to the touch. This may signal electrical resistance or circuit overload meaning your electrical outlet should be fixed immediately.
Can an Electrical Outlet Go Bad Over Time?
Yes, electric outlets can go bad over time! Think of them like a hardworking pair of shoes—day in and day out, they handle the load of powering up everything from your coffee maker to your phone charger. Over the years, all that use can cause their internal parts to loosen up or wear down.
This can lead to frustrating issues like weak connections, loss of power, and even safety risks, such as electrical fires. The best way to keep your home’s electrical system running smoothly (and safely!) is to check your outlets regularly and swap out any that show signs of aging.
Replacing an Electrical Outlet in an Old House
Older homes are some of the most common places you’ll see outdated electrical outlets that need to be fixed. These outlets may lack modern safety features, such as grounding or tamper-resistant designs, making them more prone to electrical hazards.
Outlets in older homes often show noticeable signs of wear that indicate these electrical outlets need replacement. These symptoms can include:
Discoloration: Yellowing or dark spots on the outlet, which may be due to heat, dust buildup, or electrical issues.
Loose Fitting: Outlets that feel loose when you plug something in may have worn internal parts or weakened connections.
Buzzing or Crackling Sounds: Unusual sounds from an outlet often signal an internal wiring issue, which is a serious safety risk.
These symptoms can indicate not only wear but also potential safety hazards, making it essential to inspect and replace old outlets regularly.
Neglecting to replace electrical outlets in an old house can lead to an inconsistent flow of electricity, which can impact the performance of devices. Worn or outdated outlets are more prone to short circuits, overheating, and even electrical fires, especially in homes with older wiring systems.
Lastly, holding off on replacing an electrical outlet in an old house can prolong a home’s energy savings and efficiency. Older outlets may not support the power needs of today’s electronics which can make energy savings harder and homes less efficient.
How to Replace an Electrical Outlet in an Old House
Replacing an electrical outlet in an old house can seem daunting, but with the right tools and precautions, it’s a manageable task for most DIY enthusiasts. Older homes often have unique wiring challenges that require extra care to ensure safety and compatibility. If at any time this job is overwhelming, stop and call a professional to help!
Here’s a guide to replacing an electrical outlet in an old house:
- Turn Off the Power: Ensure power to the outlet is off at the breaker box, as older homes may have complex wiring layouts. Test with a voltage tester to confirm safety.
- Check for Grounding: Many old homes use two-prong (non-grounded) outlets. When replacing an outlet in an old house, it’s often advisable to install grounded, three-prong outlets for enhanced safety and compliance with current codes. However, upgrading to a grounded outlet may require additional work, such as grounding the electrical box or adding a GFCI outlet if a ground wire isn’t available.
- Examine the Wiring: Older wiring may be brittle or frayed, so inspect the wires carefully before connecting a new outlet. Damaged wires may need stripping or trimming, and in some cases, rewiring by a professional may be necessary.
- Consider Compatibility with Existing Electrical Box: Older homes might have shallow or narrow electrical boxes that may not fit newer outlets easily. You may need an adapter or a compatible outlet to fit within the existing box, or it might be best to have your breaker box upgraded and replaced by an electrician.
- Check Local Electrical Codes: Some regions have specific requirements for upgrades in older homes, especially regarding grounding or using GFCI outlets in certain areas like kitchens and bathrooms.
Replacing outlets in an old house reduces the risk of shock, fire, and power fluctuations. In the same way, modern outlets can handle the needs of today’s appliances, ensuring safe and efficient operation. An updated electrical system, including outlets, can even increase property value!
How to Fix Loose Electrical Outlet
A loose electrical outlet is more than just an inconvenience—it can pose a serious safety hazard. Over time, constant use or improper installation can cause an outlet to shift, leading to unstable connections that may spark or overheat. Here’s a step-by-step guide on how to fix a loose electrical outlet:
- Shut off the breaker the outlet is on.
- Remove the faceplate by unscrewing the screws.
- Tighten the screws holding the outlet to the electrical box.
- Replace the faceplate and turn the breaker back on.
How to Change an Electrical Outlet
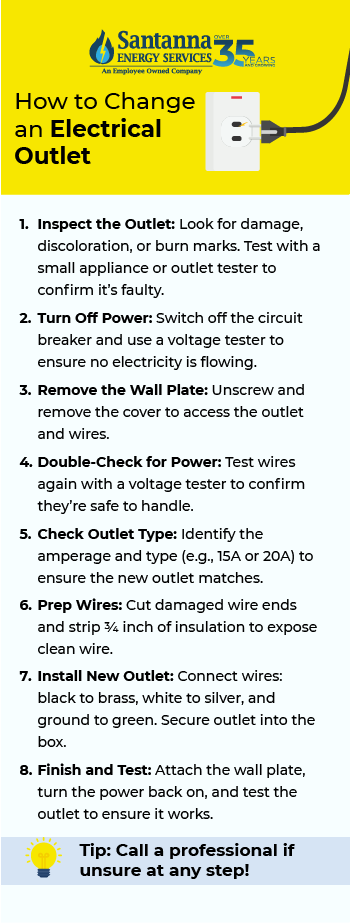 Changing an electrical outlet is a straightforward way to improve safety and functionality in your home. Whether you’re upgrading or replacing a damaged one, knowing how to properly change an outlet can save time and money. Here’s a step-by-step guide on how to change an electrical outlet:
- Check the Outlet: Inspect the outlet to confirm it needs replacement. Look for signs of damage, discoloration, or burn marks. If it’s not working, testing it with a small appliance or an outlet tester can confirm it’s faulty.
- Turn Off the Power: Go to your electrical panel and switch off the circuit breaker that powers the outlet you’re working on. Use a voltage tester on the outlet to ensure the power is completely off before proceeding.
- Remove the Wall Plate: Unscrew and remove the outlet’s wall plate. This will give you access to the outlet and any attached wires.
- Double Check Wires for Power: Use a voltage tester again to confirm there is no electrical current in any of the wires. This is an essential safety step to avoid accidental shocks.
- Determine the Receptacle Size: Take note of the type and amperage of the existing outlet (e.g., 15A or 20A, grounded vs. non-grounded) to ensure you’re installing the correct replacement. Check local codes if you’re unsure, as some areas require specific outlet types, especially in kitchens and bathrooms.
- Snip and Re-strip Damaged Wire Ends: Inspect the wires for any fraying, discoloration, or damage. If necessary, use wire cutters to snip the ends and wire strippers to strip about ¾ inch of insulation from the ends of the wires, creating a clean contact for the new outlet. If you’re not experienced with wiring, it’s important to stop and call a professional to ensure safety and additional damage.
- Install the New Receptacle: Connect the wires to the new outlet. Typically, the black (hot) wire connects to the brass screw, the white (neutral) wire to the silver screw, and the green or bare (ground) wire to the green screw. Use either the back-wire inserts or the side screws, depending on the outlet type and preference. Carefully fold the wires into the electrical box, ensuring they’re not pinched or crimped. Secure the outlet with mounting screws, making sure it’s firmly in place. Once again, if you’re not experienced with wiring, it’s important to stop and call a professional to ensure safety and additional damage.
- Replace the Wall Plate and Restore Power: Reattach the wall plate, making sure it sits flush against the wall, and turn the power back on at the breaker. Test the outlet with a small appliance to ensure it’s working correctly.
Brand Recommendations For Good Electric Outlets That Handle More Amps
If you’re looking for an outlet that handles more amps, you might need to upgrade your breaker box first to handle more power. Upgrading to a breaker box that can accommodate home expansions, new appliances, or energy-efficient systems can allow for future upgrades. Increasing a circuit’s amperage can help your home handle your family’s energy consumption without compromising the electrical system’s performance.
If you’re set on finding a good electric outlet that handles more amps, here are our top picks:
20 Amp Outlets
Micmi Decorator Receptacle Outlet: This durable, tamper-resistant electrical outlet is suitable for residential and commercial use. It features easy installation options and comes with self-grounding clips to protect electrical appliances.
AIDA Outlets Duplex Electrical Receptacle Outlets: These outlets are tamper-resistant, heavy-duty outlets designed for residential use. The AIDA outlet features a 3-wire design, self-grounding clip, and is UL listed for safety.
BESTTEN Decorator Wall Receptacle Outlet: This outlet features a high-impact polycarbonate thermoplastic construction, side and back wiring options, and includes wall plates.
15 Amp Outlets
Leviton E5325-MW Decora Edge: This outlet is designed for tamper-resistant quick and efficient wiring. It features lever terminals, a large strap for easier installation, and compatibility with 14- and 12-gauge wires.
Leviton T5325 Decora Tamper-Resistant Outlets: This tamper-resistant duplex outlet designed for enhanced safety and durability. It features a quickwire push-in and side wiring for easy installation.
ENERLITES White Decorator Receptacle: This outlet features a durable polycarbonate thermoplastic construction, self-grounding design, and easy installation with back and side wiring options.
Benefits of Electric Outlet Covers
Electric outlet covers may seem like small additions, but they play a crucial role in maintaining a safe and energy-efficient home. These covers protect outlets from dust, debris, and moisture, helping to prevent electrical malfunctions. For households with children, they add an extra layer of safety; here are some of the benefits of electric outlet covers:
- Enhanced Safety for Children and Pets: Prevents unwanted objects from being inserted.
- Protection from Dust and Debris: Helps avoid short circuits by keeping outlets clean.
- Reduced Risk of Accidental Contact: Lowers the chance of brushing against live outlets.
- Prevention of Moisture Buildup: Essential for outlets in damp areas.
- Protection During Infrequent Use: Guards unused outlets from accidental wear.
- Enhanced Aesthetic Appeal: Covers can improve a room’s look and blend with decor.
- Additional Fire Prevention: Minimizes spark risks in older outlets.
When To Call Someone To Replace Outlets
Replacing an electrical outlet can be an easy job with the right tools and set of skills. No matter how you slice it, you’re dealing with electricity which should be dealt with, with caution. If you’re unsure or encounter any of these while you’re replacing your outlet, it’s time to call a professional:
- Faulty Wiring: Exposed, brittle, or damaged wires require a licensed electrician for safe repair.
- Upgrading to GFCI Outlets: Building codes may require GFCIs in areas with moisture. An electrician can ensure proper grounding.
- Outdated Two-Prong Outlets: Replacing non-grounded outlets may need additional wiring work.
- Signs of Burn Marks or Burning Smell: This can indicate overheating or internal damage that an electrician is more capable to handel.
- Warm Outlets: This could signal circuit overloads or poor connections which an electrician is skilled to dealt with.
- Multiple Outlet Replacements: For multiple outlets, hiring an electrician ensures consistent, code-compliant installation.
- If You’re Not Confident in Electrical Work: Electricity can be dangerous; it’s often best to rely on professionals.
- Quality Assurance: Proper installation reduces the risk of future issues and complying to building codes.
- Warranty and Peace of Mind: Most professionals can offer warranties on their work.
Cost to Replace an Electrical Outlet
Replacing outlets costs around $175 per outlet in most cases, and prices typically range from $125 up to $200, depending on the type of outlet. A normal range for replacing an electrical outlet ranges between $125 – $200.
The cost to replace an electrical consists of labor, materials, new outlets, and switches. Additional upgrades like rewiring to fit your electrical outlet will require an additional cost. According to Angi, here’s how much wiring and rewiring for replacing an electrical outlet will cost you in 2024:
Average Cost of a Rewiring Upgrade in 2024
| Rewiring Upgrade | Average Cost |
|---|---|
| Rewiring or Adding a New Circuit | $250-$1,000 |
| Snaking a New Wire | $27 per foot |
| Rewiring an Old House | $1,500-$10,000 |
Can One Bad Outlet Affect Others?
Yes, one bad outlet can indeed affect others, especially if the outlets are “daisy-chained” together on the same circuit, which is common in many homes. In this setup, electricity flows from one outlet to the next in a series. A malfunction in one outlet can lead to performance drops or even complete failure in downstream outlets.
Here’s how a single faulty outlet can impact the rest of your electrical system:
Power Disruptions in a Circuit: If one outlet fails or has a poor connection, it can interrupt power to outlets further along the circuit, causing them to stop working or function inconsistently.
Increased Risk of Overheating and Fire Hazards: A single faulty outlet can create resistance, which may cause overheating in the circuit. This can lead to arcing (sparking) and even start a fire, especially if other outlets on the same circuit are in use.
Potential Damage to Devices: When one outlet isn’t functioning correctly, it can lead to fluctuations or surges in the electrical current. These variations can damage sensitive devices, especially electronics, plugged into other outlets on the same circuit.
Troubleshooting Chain Reactions: If multiple outlets suddenly stop working, the root cause often lies with a single faulty outlet. Replacing or repairing that outlet can often restore power to the others.
A serious fault in one outlet could put the entire circuit at risk, so promptly addressing any outlet issues is essential for maintaining a safe and stable electrical system.
Replacing outdated or damaged outlets is essential for maintaining a safe and efficient home. From addressing loose connections to upgrading to modern, grounded outlets, ensuring your outlets are in good condition helps prevent electrical hazards and improves functionality.
By keeping your outlets in top shape, you not only create a safer living environment but also enhance your home’s energy efficiency. Take your home to the next level by pairing these upgrades with Santanna’s Unlimited Energy Plan to stabilize your monthly energy supply costs, ensuring your home stays safe and budget-friendly as your energy needs evolve.*
* Restrictions apply. Enrollment based upon program eligibility. Customers using more than 125% of normal monthly usage as determined by Santanna may be required to switch plans.
Tyler is an experienced energy professional, having worked for Santanna Energy Services, for the past four years. He is passionate about renewable energy and believes that diversifying the energy grid is the key to a sustainable future. Tyler is dedicated to supplying consumers with the best possible energy solutions and works diligently to make sure that Santanna can deliver the highest quality service.


