Why Has My Electrical Outlet Stopped Working?
by Tyler Castle
17.4 min read
Electrical outlets are essential for powering our daily devices and appliances, but when they suddenly stop working, it can be more than just an inconvenience. Troubleshooting dead outlets is crucial for maintaining both the safety and functionality of your home’s electrical system.
But how exactly can you tell when your electric outlet has stopped working? We’ll guide you through common causes of dead outlets, how to troubleshoot them, and insights on why your electrical outlet stopped working. Keep reading for more!
Key Points of This Article:
- Electrical outlets can stop working due to common issues such as overloaded circuits, damaged wiring, loose connections, worn components, or tripped breakers and GFCI outlets.
- Dead outlets can be dangerous because loose or damaged wiring may cause overheating, sparks, electric shock risks, or potential fire hazards.
- Basic troubleshooting includes turning off power, inspecting the outlet and wiring for looseness or damage, tightening connections, and testing the outlet after reassembly.
- If the outlet still does not work or shows signs of burning, wiring damage, or repeated failures, a licensed electrician should inspect and repair the problem to ensure safety.
What Stops Electricity From Working?
When an outlet stops working in your home, there are many reason electricity stops working. Here are some of the most common reason of what stops electricity from working:
Overloaded Circuits (Too Much Electricity Use): When multiple high-energy devices are used on the same circuit, it can overload, causing a breaker to trip or a fuse to blow which causes electricity to stop working. Regularly using more power than a circuit can handle can also wear down components over time, leading to intermittent power loss.
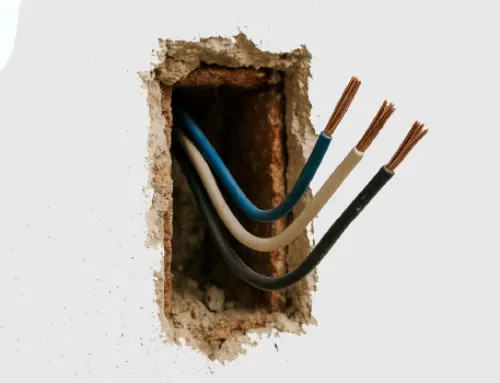
Faulty or Damaged Wiring: Damaged wires, whether from age, pests, or physical impact, can interrupt the flow of electricity to your outlet which can stop electricity from working.
Loose Connections: Over time, connections within outlets can loosen because of vibrations, temperature changes, or wear. Loose connections reduce contact and cause inconsistent power flow or sudden loss of electricity.
Old or Worn-Out Components: Older electrical components in outlets may wear out and stop electricity from working. Aging parts are more prone to failure, especially if they’re frequently used or overloaded.
Understanding these potential causes can make it easier to identify why your electrical outlet might have stopped working and guide you toward the best solution for a fix.
Reasons Your Electric Outlet Stopped Working
When an electrical outlet stops working, it can be frustrating and may even signal underlying issues within your home’s electrical system. There are several potential reasons an outlet might lose power; here are some of the most obvious reasons your electrical outlet stopped working:
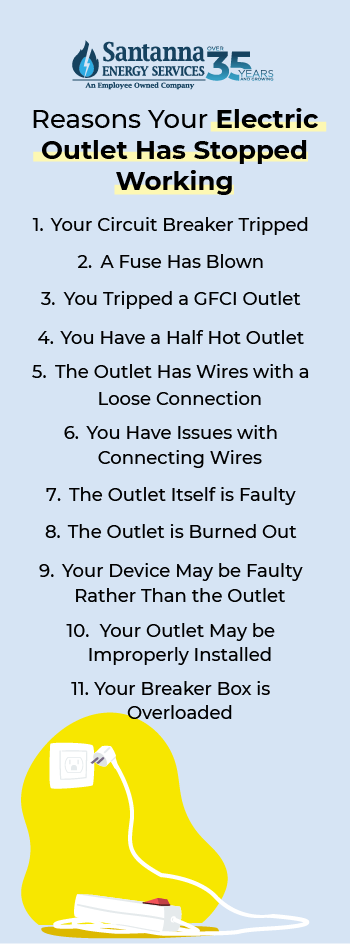
 1. A Circuit Breaker Tripped
A tripped circuit breaker is one of the most common reason an electrical outlet has stopped working. Circuit breakers are designed to cut off power when too much electricity flows through a circuit, protecting against overheating and potential fires.
If multiple devices or high-energy appliances are connected to one circuit, it can overload, causing the breaker to trip. A tripped breaker will prevent your outlet from working until its reset. If you suspect a tripped circuit breaker, you’ll typically notice lights and outlets within the same circuit have stopped.
To reset a tripped breaker, start by locating your home’s electrical panel or breaker box, which is typically found in the basement, garage, or a utility room. Open the panel and look for a switch that’s out of line with the others, often this switch is in the “off” position. Flip the switch into the “on” position to reset it.
2. The Fuse is Blown
In older homes, fuse boxes may replace circuit breakers. A fuse blows when the current exceeds a safe level which stops the flow of electricity. Blown fuses are common with high power demands or faulty devices and prevent the entire circuit from working until the fuse is replaced.
3. Tripped GFCI Outlets
Ground Fault Circuit Interrupter (GFCI) outlets protect against electric shocks, especially in moisture-prone areas like bathrooms, kitchens, and outdoor spaces. If you have this type of outlet, GFCI’s automatically cut power if they detect an imbalance. Tripped GFCIs cut power to all downstream outlets on the same circuit, even if the breaker isn’t affected which stops your electrical outlet from working.
GFCI outlets often come with a red reset button in the middle; pushing the button to reactivate malfunctioning electric outlets usually does the trick to turn your outlet back on.
4. You Have a Half-Hot Outlet
Half-hot outlets are wired so that one half of the outlet is always on, while the other is controlled by a wall switch. They’re often used for convenience with lamps or small appliances that need to be manually controlled. If the switch is accidentally turned off or there’s a wiring issue, the half-hot outlet will stop working. Power can usually be restored by flipping the associated switch to “on” position.
5. The Outlet Has Wires with a Loose Connection
Loose connections can happen over time because of age, frequent use, or improper installation. When wires inside an outlet loosen, they create an intermittent or weak connection, which can stop your electric outlet from working. Loose connections can also cause sparks, overheating, or fire hazards so don’t take this issue lightly.
6. Issues with Connecting Wires
Beyond the outlet itself, the wiring connecting outlets to the circuit may have issues that can cause your electric outlet to stop working. Over time, wiring insulation can degrade causing them to loosen because of vibrations. These issues can affect one outlet or multiple outlets on the same circuit, even if the outlet itself is in good condition.
7. The Outlet Itself is Faulty
Like any hardware, outlets wear out over time, especially if they’re used frequently or subjected to heavy loads. Internal components can become loose or damaged, causing the electrical outlet to stop working. Faulty outlets often require replacement to restore reliable power.
8. Burned Out Outlets
Outlets can burn out if they’ve been overloaded or have suffered damage from a surge which stops your electric outlet from working. Burned-out outlets usually show visible signs of damage, like scorch marks, melted plastic, or a burnt smell. They’re a safety hazard and should be replaced immediately to prevent further electrical risks.
9. Your Device May be Faulty Rather Than the Outlet
On the other side of the coin, the issue may not be with the outlet at all, but rather with the device you’re trying to power. Malfunctioning devices, especially older appliances are prone to blowing out. To test this, try the device in a different outlet or with a different power cable to isolate the issue.
10. Your Outlet May be Improperly Installed
Outlets that are not properly installed or secured can cause connection issues and stop your electric outlet from working. Make sure the outlet is securely mounted, and the wiring is done by a professional. Improper installation by an amateur can lead to dangerous situations such as fires and electric shocks.
11. Your Breaker Box is Overloaded
If your outlet stopped working, this might be a sign that your breaker box or electrical panel is overloaded. When too many devices draw power on the same circuit, it can cause the breaker to trip as a safety measure, cutting off power to prevent overheating. If your breaker box frequently gets overloaded, this might be a sign you need a breaker box upgrade. An upgraded electric panel handles more electricity consumption and leads to less malfunctions with your outlets.
Is a Dead Outlet Dangerous?
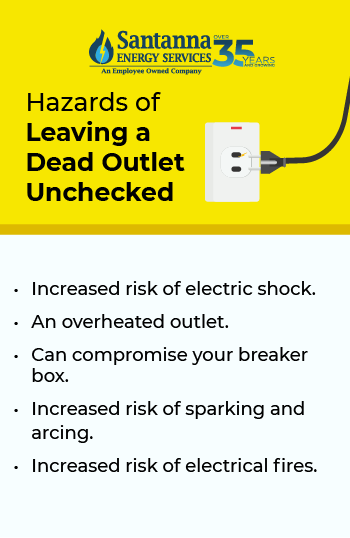
A dead outlet can be dangerous if you leave it unchecked. It’s important to address dead outlets promptly to ensure the safety of your home and prevent any risks to family members. There are several things that make dead outlets dangerous:
Dangers of a Dead Outlet
A dead outlet can lead to an increased risk of electric shock if someone touches it. Even if these outlets don’t work when you plug in a device, they still might carry an electrical current which can shock humans and even pets.
Loose connections or damaged wires from an electric outlet that has stopped working can create resistance, which may cause the outlet to overheat. This can lead to melted parts, burning smells, or can even lead to electrical fires if left unaddressed. A dangerous dead outlet could indicate underlying electrical problems, such as faulty wiring, circuit overload, or a compromised breaker.
Faulty outlets may spark or arc, which can ignite nearby flammable materials, posing a serious fire hazard. Leaving a dead outlet unchecked can damage sensitive electronic devices, causing them to short-circuit, fail, or cause electrical arcing. Lastly, a dead outlet can cause small sparks that may go unnoticed at first. Over time, these sparks can lead to significant damage or start fires, particularly if flammable objects are nearby.
How To Fix Electrical Outlet That Stopped Working
Fixing an electric outlet that has stopped working isn’t hard with the right tools, precautions, and professionals in place.
Tools To Diagnose Various Electrical Problems
The first thing you want to do before fixing your electrical outlet that’s stopped working is to identify the problem. If you’re not sure where to start and how to identify the problem within your outlet, here are some of the best tools you can use to diagnose your electrical problem:
To diagnose various electrical problems accurately, a multimeter is indispensable. Analog or digital multimeters are used to measure electrical parameters like voltage, current, and resistance. You can use a multimeter to check:
- Transformers
- Diodes
- Capacitors
- Voltage regulator ICs
- Open circuits
- Voltage drops
- Abnormal current flows
In the same way, oscilloscopes can analyze signal integrity and can observe fluctuations that could indicate faulty components or interference in your electrical outlet.
If you don’t have the necessary tools to diagnose the issue of your electric outlet that has stopped working, we recommend getting them before starting any repairs to ensure maximum safety and to avoid additional repairs. Once you’re properly equipped, follow these troubleshooting steps to safely identify and potentially resolve the problem with your outlet.
Troubleshooting Steps When Electric Outlet Is Not Working
If you find your electric outlet isn’t working, here are some steps to troubleshoot your problem:
- Turn off power to the outlet at the breaker panel: Flip the corresponding breaker switch to the “off” position to ensure safety and avoid electrical hazards.
- Remove the outlet cover: Use a screwdriver to take off the faceplate, then carefully pull the outlet out from the wall box.
- Inspect the terminal screws for looseness: Check if the screws are tight and holding the wires securely. For outlets with stab-in connections, ensure the wires are securely inserted. If needed, gently adjust each wire at the connection point or tug slightly to confirm they’re firmly in place. Tighten any loose screws you find.
- Examine the connected wiring for damage: Look for signs of burnt or melted insulation, which indicates overheating. Over time, wires can also break or corrode. If you notice damage, have a licensed electrician repair or replace the affected wiring.
- Reassemble the outlet: Place the outlet back into the junction box, secure the faceplate, and turn the breaker switch back to “on.”
- Test the outlet: Plug a device into the outlet to ensure it is functioning properly.
If your outlet still isn’t working, it’s better to keep the breaker switch to our outlet turned off until it can addressed by a professional to prevent further damage or harm.
What to Do If The Electrical Wall Outlet is Not Working But Your Breaker Isn’t Tripped
If your electrical wall outlet isn’t working but your breaker isn’t tripped, it might mean several things:
You Have Loose Connections in Your Outlet or Wiring: Sometimes, the wires connected to the outlet’s terminals can become loose, especially in older homes or with outlets that see frequent use. If you believe this is the case, try turning off the power to the outlet at the breaker, then remove the outlet cover and check for any loose or disconnected wires.
If you spot loose wires, tighten them securely. If unsure, call a professional to handle the inspection safely.
You Have a Burnt Out or Worn Out Outlet: If your electrical outlet isn’t working but your breaker isn’t tripped, your outlet might have burned out. Signs of a burned-out outlet include scorch marks, a burnt smell, or discoloration around the outlet are common indicators of a burnt-out outlet.
To solve this issue, have a professional replace your outlet, ensuring the power is off at the breaker. If signs of burnt wiring are present, consult an electrician to inspect the wiring for further damage.
Your GFCI Outlet Has Tripped Upstream: If the GFCI trips, it’s common for any downstream outlets on the same circuit will lose power, even though the breaker is unaffected. To troubleshoot this issue, locate and check all nearby GFCI outlets, especially in kitchens, bathrooms, and outdoor areas. Press the “Reset” button to restore power if one has tripped. If this problem still persists, call a professional.
You Have Damaged or Worn Wiring Behind Your Walls If your electrical outlet isn’t working but your breaker isn’t tripped, this might indicate a problem with internal wiring. Over time, wiring can become damaged from rodents, aging, or construction-related disruptions, affecting outlet function without impacting the breaker. It’s recommended to have an electrician check behind walls or trace wiring to locate the problem and fix your problem.
How to Install an Electrical Outlet
Installing an electrical outlet may seem straightforward, but it requires careful attention to safety and wiring details to ensure proper functionality. Whether you’re adding a new outlet or replacing an old one, following the correct steps can help you complete the installation safely and efficiently.
Here’s how to install and replace an electrical outlet:
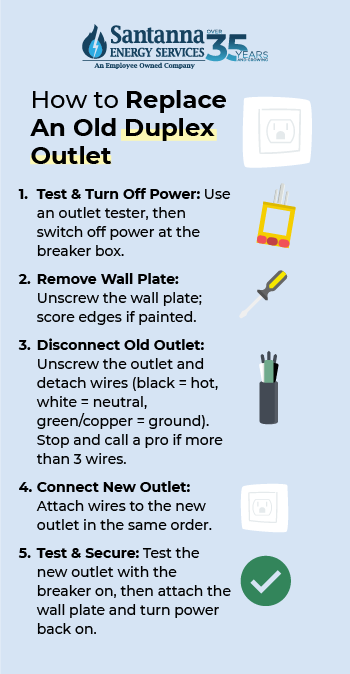
Replacing an Old Duplex Outlet
Step 1: To make sure you’re working on the right outlet, use an outlet tester. Plug the tester into the outlet, then turn off the power to that outlet at the main breaker box.
Step 2: Use a flathead screwdriver to unscrew and remove the old wall plate. If the wall plate has been painted over, gently score around the edges with a utility knife to help loosen it.
Step 3: Remove the old outlet by unscrewing the screws at the top and bottom. Carefully pull the outlet out a little to see the wires. You’ll usually find three types of wires: hot wires that are black wires that attach to gold or brass screws, neutral wires that are white and connect to silver screws, and ground wires that are usually copper or green that connect to green or copper screws. Unscrew each type of wire in the order above.
Note: if you see more than 3 wires in your outlet, stop and call a licensed electrician.
Step 4: Connect the wires to the new outlet in the same order as on the old outlet. Make sure the new wall plate will fit over the outlet before finishing. Check and replace any worn-out wire connectors.
Step 5: Secure the new outlet back into the electrical box with screws. Before reattaching the wall plate, turn the breaker back on and use the outlet tester to ensure everything works. If it’s working, turn the breaker off again, attach the wall plate, and finally switch the breaker on. Your new outlet is now ready for use.
Be sure to use caution and be safe during this process. If at any time you feel overwhelmed or feel you’re in danger, leave your breaker box off and call a professional electrician.
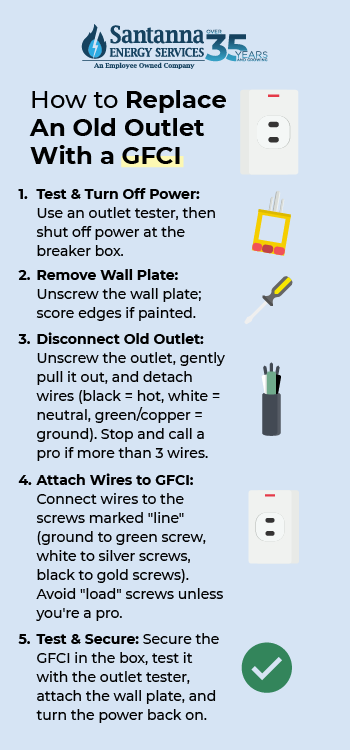
Replacing an Old Outlet With a GFCI Outlet
Step 1: Use an outlet tester to confirm you’re working on the correct outlet. Plug in the tester, then turn off power to the outlet at the main breaker box.
Step 2: Remove the wall plate by unscrewing it with a flathead screwdriver. If the plate is painted over, carefully score around the edges with a non-metal utility knife to help loosen it.
Step 3: Take out the old outlet by unscrewing the top and bottom screws. Gently pull the outlet forward to see the wiring clearly, being careful not to damage the wires. You’ll likely see three types of wires: black hot wires, white neutral wires, copper or green ground wires. Be sure to remove the wires in this order.
Note: if you see more than 3 wires in your outlet, stop and call a licensed electrician.
Step 4: After detaching the wires, use needle-nose pliers to straighten them. Look at the back of the new GFCI outlet, where you’ll see two pairs of screws—one brass/gold pair and one silver pair, marked as “line” or “load.” Only connect wires to the “line” screws; the “load” screws are for professional use so if you’re not a professional, only use the screws marked “line”. There will also be a ground screw, usually at the bottom.
Step 5: Loosen the three screws you’ll be using to attach to the GFCI outlet. Reattach the wires in reverse order: connect the green ground wire to the ground screw first and tighten it. Next, connect the white neutral wire with two of the silver screws, tightening both. Finally, connect the black hot wire to one of the brass or gold screws and secure both.
Step 6: Secure the new GFCI outlet into the electrical box. Before attaching the wall plate, turn the breaker back on and test the outlet with the outlet tester. You may need to press the reset button on the GFCI to activate it. If everything is working, turn off the breaker again, attach the wall plate (one that fits your new GFCI outlet, and turn the power back on.
Be sure to use caution and be safe during this process. If at any time you feel overwhelmed or feel you’re in danger, leave your breaker box off and call a professional electrician.
Not sure which outlet brand you should choose for your replacement? The more energy you need, the more powerful the outlet. We recommend the Micmi Decorator Receptacle Outlet for 20-amp outlets and the Leviton E5325-MW Decora Edge for 15-amp outlets!
When to Call a Professional Electrician
You should call a professional electrician if you notice any signs of faulty wiring, experience a tripped breaker that quickly resets, or have outlets that stop working without tripping the breaker. Professionals are trained to solve any type of electrical problem you may have if your outlet stopped working. It’s better to be safe than sorry!
Electrical Safety Tips You Need to Know
With all this in mind while you’re inspecting your malfunctioning outlet, it’s important to keep safety as your top priority. Here are some of our best electrical safety tips for your home to keep your family and your home safe:
- Unplug appliances when not in use: Leaving appliances plugged in, even when not in use, can still draw electricity and increase the risk of electrical fires.
- Don’t overuse outlets: Plugging too many devices into one outlet or power strip can overload the circuit causing sparks and fire risk.
- Regularly inspect your electrical cords: Frayed or damaged cords can expose wires and increase the risk of electric shock.
- Make sure your smoke detectors are working: Functioning smoke detectors provide an essential warning in case of electrical fires, giving you and your family the chance to respond quickly.
- Keep your appliances away from water: Water and electricity do not mix. Electrical appliances in wet areas can lead to dangerous electric shocks; always keep them a safe distance from water sources to prevent accidents.
For more electrical safety tips homeowners need to know, visit here!
Understanding why your electrical outlet has stopped working is essential for keeping your home safe and functioning smoothly. By learning some basic troubleshooting steps, you can handle minor issues, like tripped breakers or GFCIs, with ease. However, if you suspect a more complex issue, it’s always best to call a professional to ensure safety. Remember, electrical work can be hazardous, so never take chances.
And when it comes to your electricity bill, don’t take chances on the fluctuation of your monthly supply charge. With Santanna’s Unlimited Energy Plan, you’ll have peace of mind knowing your monthly supply charge stays the same, no matter how many outlets need fixing or how much power you use!*
* Restrictions apply. Enrollment based upon program eligibility. Customers using more than 125% of normal monthly usage as determined by Santanna may be required to switch plans.
Tyler is an experienced energy professional, having worked for Santanna Energy Services, for the past four years. He is passionate about renewable energy and believes that diversifying the energy grid is the key to a sustainable future. Tyler is dedicated to supplying consumers with the best possible energy solutions and works diligently to make sure that Santanna can deliver the highest quality service.


 1. A Circuit Breaker Tripped