
How to Replace and Install Door Weather Stripping

by Jenna Mendez
13.1 min read

Weatherstripping is a crucial element in maintaining the energy efficiency and comfort of your home. Over time, door weather stripping can become worn, damaged, or less effective, leading to drafts, higher energy bills, and decreased indoor comfort. Whether you’re looking to install new weather stripping or replace old, ineffective seals, understanding the process can make a significant difference in keeping your home insulated and protected from the elements.
We’ll provide a comprehensive guide on the various types of weather stripping, the best options for sliding doors, the lower part of your door, and beyond! Not only will we teach you the process, but we’ll also share how to replace and install stripping on all the doors in your home.
Key Points of This Article:
- Choosing the right weatherstripping depends on the door type, climate, and the size of gaps that need sealing.
- Different materials such as tension seals, foam, vinyl gaskets, pile, and metal each serve specific purposes for interior, exterior, sliding, and garage doors.
- Proper installation involves measuring, cutting, attaching the material, and testing to ensure a consistent, airtight seal.
- Maintaining and replacing worn weatherstripping improves energy efficiency, reduces drafts, and protects the home from moisture, pests, and temperature loss.
How to choose the right door weatherstripping
Depending on the door you’re looking to weather strip, the material you use can make all the difference with the level of protection you’ll get. When choosing weatherstripping, consider the following factors:
Different materials work better on various door types (e.g., foam tape for interior doors, V-channel for exterior doors).
Consider your local climate when selecting weatherstripping. For colder climates, materials with better insulation properties are preferable.
While some materials may be more expensive upfront, they could offer longer-lasting benefits and better performance.
Comparison of weatherstripping materials
When it comes to weather stripping materials, selecting the right type can greatly impact the effectiveness and durability of your weather sealing. Each material offers distinct benefits and drawbacks depending on your specific needs and application. Here’s a breakdown of the most common kinds and what they’re ideal for:
Tension seal (V-Channel)
Tension Seal weather stripping is ideal for doors, and windows, and is able to fit tight spaces and narrow gaps. This type of stripping helps create a tight seal in gaps that vary in size, particularly for exterior doors that experience frequent use.
Felt weatherstripping
Felt weather stripping is ideal for interior doors, windows, and less-trafficked areas. Felt stripping is budget-friendly, costing less than five dollars to purchase. Typically made from compressed wool, polyester, or cotton, felt weather stripping comes in adhesive-backed rolls or strips that are simple to cut to size. Felt is less durable than other weather stripping materials and requires more frequent replacement.
Vinyl gasket
Vinyl Gasket is ideal for sealing large gaps around doors and garage doors. Made from flexible, high-quality vinyl, this type of weather stripping features a rubber or vinyl gasket that compresses when the door is closed. Vinyl gasket stripping is best for exterior applications where a durable, weather-resistant seal is needed, particularly in regions with extreme weather conditions.
Foam
Foam weather stripping is Ideal for interior doors and windows with smaller gaps. Foam weather stripping differs from felt weather stripping primarily in material, durability, and performance. Foam weather stripping is made from soft, compressible materials like polyurethane.
Foam weather stripping is inexpensive and effective when it comes to blocking air, moisture, and noise than felt, offering a higher level of insulation.
Door sweep
Door sweeps are a form of insulation that’s best for the bottom of doors, particularly exterior doors. Door sweeps are excellent at preventing drafts from entering under the door and even keep pests out. Usually made from silicone, door sweeps help muffle noise and keep cold and warm air out.
Ideal for front and back doors with heavy traffic, door sweeps Prevent drafts, dirt, and moisture from entering under the door.
Frost brake threshold
Forst brake threshold weatherstripping is ideal for exterior doors where there’s a significant temperature difference between inside and outside. This type of insulation can Block cold air from entering and reduce frost buildup at the threshold, enhancing energy efficiency. Forst brake threshold stripping is best for storm doors and garages that are subjected directly to the elements.
Pile weatherstripping
Pile weather stripping is a type of weatherproofing material commonly used around sliding doors and windows. The soft, brush-like texture of pile weather stripping creates an effective barrier against drafts without impeding the smooth movement of doors or windows. Pile is best for sealing gaps in areas where the door or window slides open and closed, providing an effective barrier against drafts, dust, and insects.
Magnetic weatherstripping
Similar to the magnetic strip found on refrigerator doors, this type of weatherstripping is typically used on steel doors and windows with metal frames. Magnetic weather stripping is ideal for steel or metal doors to protect against drafts, moisture, dust, and insects. This material is best for creating a strong, airtight seal; energy efficient; and reducing drafts in exterior doors.
Tubular weatherstripping
Tubular weatherstripping is a durable and highly effective solution for sealing gaps around doors and windows to block drafts, moisture, and air leaks. It is made from materials like rubber, vinyl, or silicone, formed into a tube shape. Its flexibility allows it to conform to irregular surfaces, and it works well in high-traffic areas due to its durability.
Metal weatherstripping
Metal weatherstripping is a robust and long-lasting solution for sealing gaps around doors and windows. Metal weather stripping provides exceptional protection against drafts, moisture, and air infiltration. Made from materials like aluminum, bronze, or stainless steel, metal weatherstripping is often used in older homes and commercial buildings due to its durability and effectiveness.
Aluminum and stainless-steel door sweeps
Because of its sturdy structure, aluminum and stainless steel door sweeps are ideal for exterior doors that are continuously exposed to harsh elements. Aluminum sweeps are lightweight, cost-effective, and resistant to corrosion, while stainless-steel sweeps offer higher durability and resistance to rust. Both types are excellent for improving energy efficiency by reducing air leaks and maintaining indoor temperatures.
Selecting weatherstripping for specific doors
Selecting the best weather stripping for doors requires considering several factors. This includes the type of door you have, the climate, and the level of insulation you need.
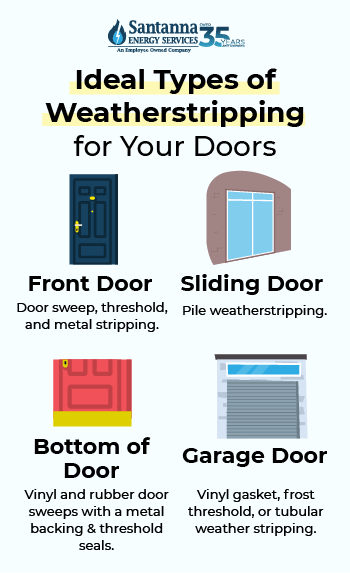
The best front door weather stripping
A high-quality door sweep is by far one of the best weather stripping options for a front door because of its sturdy and long-lasting design. In the same way, door sweeps reach all the way to the floor providing complete coverage from outdoor elements. Frost brake threshold and metal stripping is strong and ideal to keep out the cold when you need it.
Durable, weather-resistant options are the best weather stripping options for front doors. Front doors are the primary entry and exit points of your home, often exposed to the elements. Choose weatherstripping that can handle constant use and varying weather conditions.
The best sliding door weather stripping
The best weather stripping for a sliding door is pile weather stripping. The brush design of pile weather stripping is made to slide doors through this material while keeping air contained when not in use. This material can compress easily, allowing the door to slide without resistance.
Bulky or rigid material can hinder the door’s movement. Be sure to select weather stripping that’s thin and won’t interfere with door movement. Foam tape can be used along the edges of the door frame to fill in smaller gaps without obstructing the sliding mechanism.
Best weather stripping for the bottom of a door
Vinyl and rubber are common choices for door sweeps due to their durability and ability to create a good seal against various floor types. For homes with pets or heavy traffic, consider using a reinforced door sweep with a metal backing.
Choose weatherstripping designed to create a tight seal at the bottom of the door, ensuring it addresses gaps and prevents drafts, dirt, and moisture from entering.
For the bottom of a door, a variety of weatherstripping types can be effective, including door sweeps, threshold seals, and brush seals. Door sweeps are mounted to the bottom of the door and feature a flexible strip that seals against the floor. Threshold seals, installed on the floor beneath the door, work in tandem with the door sweep.
Best weather stripping for garage doors
Vinyl gasket, frost threshold, or tubular weather stripping is ideal for garage doors. Tubular weather stripping can fit snuggly around the bottom of a garage door and rubber materials are highly effective at sealing gaps. Frost threshold weatherstripping helps prevent drafts, water, debris, and cold weather from entering your garage.
Garage door bottom seals are specifically designed for the bottom of garage doors too. These materials often come in a variety of materials such as rubber, vinyl, or a combination of both. They are ideal for sealing gaps between the door and the floor.
Tools and materials for weatherstripping
If you’re looking to replace or install the weather stripping on your doors or windows, here are a couple of tools you’ll need for the job:
- Measuring tape
- Utility knife or scissors
- Hammer and nails (or adhesive if needed)
- Screwdriver
- Door sweep installation tools
- Weatherstripping (foam tape, V-channel, felt, etc.)
- Door sweep
- Sealant (optional for additional protection)
How to install door weather stripping

Step 1: Measuring the Door/Area: Use a measuring tape to determine the dimensions of the door frame and the size of any gaps. Measure both the length and width of the door, including the sides, top, and bottom. Any irregularities in the door frame that may require special attention during installation.
Step 2: Cutting the Weatherstripping to Size: Cut the weatherstripping material to match the dimensions measured. Use a utility knife or scissors to make clean, precise cuts, ensuring no gaps or overlaps when applied. For V-channel weatherstripping, fold it along its crease before cutting to ensure a straight edge.
Step 3: Applying/Attaching the Weatherstripping: Peel off the backing of adhesive weatherstripping and press it firmly along the door frame. Start at one end and work your way around, ensuring the material is straight and even. For non-adhesive weatherstripping, use nails or tacks to secure it in place. Ensure the material is tightly fitted to the frame without stretching or compressing.
Step 4 (optional): Installing a Door Sweep: Choose a door sweep that fits the width of your door. Measure and cut the sweep to size if necessary. Attach the door sweep to the bottom of the door using screws or adhesive. Ensure it’s level and provides a tight seal against the floor.
Step 5: Adjusting/Testing as Needed: After installation, open and close the door several times to test the fit of the weatherstripping. Look for areas where the seal might be too tight or too loose. Make any necessary adjustments, such as reapplying or repositioning the weatherstripping, to ensure a consistent seal around the entire door.
How to replace door bottom weather stripping
Here’s how to replace bottom of door weather stripping:
Step 1: Removing Old Weatherstripping: Begin by carefully removing any existing weatherstripping from the bottom of the door. Use a screwdriver or utility knife to pry it loose if necessary. Clean the area thoroughly to remove any debris or adhesive residue, ensuring a smooth surface for the new weatherstripping.
Step 2: Measuring and Cutting the New Weatherstripping: Measure the width of the door to determine the correct length of weatherstripping. Cut the new material to size, ensuring it fits snugly along the bottom edge.
Step 3: Installing the New Weatherstripping: Align the new weatherstripping with the bottom of the door. If it’s an adhesive type, peel off the backing and press it into place. For other types, use screws or clips to secure it. Ensure the weatherstripping is straight and even, providing a tight seal with the threshold.
Step 4: Testing and Adjusting: Test the door by opening and closing it to ensure the new weatherstripping doesn’t interfere with its operation. Make any necessary adjustments to achieve a proper seal.
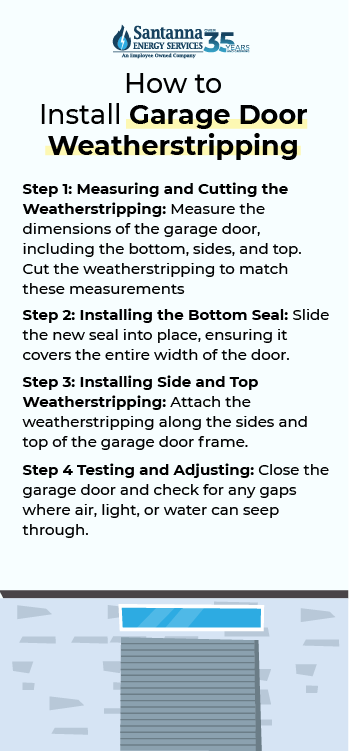
How to install weather stripping on a garage door
Step 1: Selecting the Right Weatherstripping: Choose weatherstripping specifically designed for garage doors. Common types include bottom seals, threshold seals, and side and top weatherstripping.
Step 2: Measuring and Cutting the Weatherstripping: Measure the dimensions of the garage door, including the bottom, sides, and top. Cut the weatherstripping to match these measurements, ensuring it fits snugly without being too tight.
Step 3: Installing the Bottom Seal: If replacing the bottom seal, remove the old seal and clean the groove. Slide the new seal into place, ensuring it covers the entire width of the door. For adhesive seals, apply the adhesive to the groove before inserting the seal.
Step 4: Installing Side and Top Weatherstripping: Attach the weatherstripping along the sides and top of the garage door frame. Ensure the weatherstripping is compressed slightly when the door is closed to create a tight seal.
Step 5: Testing and Adjusting: Close the garage door and check for any gaps where air, light, or water can seep through. Adjust the weatherstripping as needed to ensure a complete seal, particularly at the corners.
How failing to weatherstrip your doors affects your home’s energy efficiency
When doors are not properly weather stripped, air leaks occur, leading to drafts and temperature fluctuations within your home. This causes your heating and cooling systems to work harder to maintain the desired temperature. This strain on these systems increases, potentially leading to more frequent maintenance issues and a shorter lifespan.
Without proper weatherstripping, your home is more susceptible to uncomfortable drafts and cold spots during the winter, making it difficult to maintain a consistent indoor temperature. Poorly weather-stripped doors can also allow pollutants, allergens, and moisture to enter your home.
While the immediate consequence of not weatherstripping your doors is higher energy bills, the long-term financial impact can be even more significant. Increased energy usage not only raises your monthly expenses but also affects your home’s overall energy efficiency. Frequent replacement and monitoring of your weather stripping can improve the energy efficiency in your home.
FAQs
Do door seals go on the inside or outside?
Door seals are typically installed on the inside of the door frame, where they help block drafts, moisture, and air leaks from entering the home.
How often should you replace door weatherstripping?
Weather stripping should be replaced every few years. Be sure to examine your weather stripping yearly and look for broken pieces or gaps in your stripping. If your weather stripping looks warped, cracked or mangled, it’s time for a replacement.
Can weatherstripping also help with soundproofing?
While there’s no weather stripping designed specifically for soundproofing, a thick door sweep can help reduce noise pollution.
How do I know if my weatherstripping is properly installed?
Check for visible gaps and inconsistencies by closing the door or window and inspecting the seal. Test for drafts using a candle to see if the flame flickers. Look for signs of damage like cracks or tears, and verify that the weatherstripping makes even contact around the frame.
Proper installation and maintenance of weatherstripping are crucial for enhancing your home’s energy efficiency, comfort, and protection against the elements. At Santanna Energy Services, we understand the importance of efficient energy use and are committed to helping you maximize your home’s potential. Whether you’re looking to optimize your energy consumption or explore other ways to improve your home’s efficiency, we’ve got you covered!
Jenna Mendez is a Midwest native with lifelong roots in Illinois and time spent in Ohio during college, giving her a deep understanding of the Midwest region’s people, climate, and energy needs. She brings firsthand experience and local insight to topics that matter to Midwest homeowners, especially energy efficiency, sustainability, and home living. Jenna specializes in writing about eco-friendly living, all things Midwest, renewable energy, and practical ways to reduce energy costs. Jenna brings a trusted, and local hometown voice to every article she writes, helping readers live well, and sustainably, right where they are.