
How To Clean Air Vents To Improve Airflow & HVAC Efficiency

by Jenna Mendez
Updated: July 28, 2026
17.7 min read
Key Points of This Article:
- Cleaning supply , return , ceiling , wall , and floor vents can help remove buildup andimprove airflow throughout your home.
- A dirty HVAC filter can increase energy use by up to 15%, and airflow restrictions may add roughly $9 to $19 per month to energy costs in some homes.
- Common signs your air vents may need cleaning include visible dust around vents, weak airflow, musty odors, and rooms that no longer heat or cool evenly.
- If airflow problems, odors, or dust buildup continue after cleaning, it may be time to contact a qualified HVAC professional to identify the underlying cause.
If you've noticed more dust collecting around your home, rooms that never seem to cool evenly, or weak airflow from your vents, dirty air vents could be part of the problem.
While vent cleaning won't solve every HVAC issue, removing dust and debris from supply and return vents can help improve airflow and support your system's efficiency.
Over the years, we've seen that even simple maintenance tasks like cleaning air vents can make a noticeable difference in how a home feels and even in your energy use. In this guide, we'll walk through how to clean air vents, which vents to focus on, and how to tell when dust buildup may be affecting airflow in your home. Let's get started.
What Are the Signs Your Air Vents Need Cleaning?
While some dust buildup is normal, too much dust, debris, pet hair, and other particles can collect around vents over time. This can restrict airflow and make it harder for heated or cooled air to reach every room evenly.
Here are some of the most common signs your air vents may need cleaning:
- Visible dust buildup around vent covers
- Weak airflow coming from vents
- Rooms that feel unevenly heated or cooled
- Musty or stale odors when the HVAC system runs
- Excess dust accumulating around the home
- Increased indoor allergy symptoms
- Sewage-like odors coming from or near air vents
While visible dust and weak airflow are common warning signs, many homeowners don't wait until problems appear. In our employee-owner survey, over half (52%) said they clean their air vents and registers regularly as preventative maintenance rather than waiting until airflow declines.
If you notice one or more of these signs, cleaning your air vents may help improve airflow and comfort. However, if the problem continues after cleaning, there may be another issue affecting your HVAC system. In that case, it is often best to contact a qualified HVAC professional to inspect the system and identify the cause of the airflow problem.
Which Air Vents Should You Clean?
One thing many homeowners don't realize is that different vents collect dust in different ways. Return vents and floor vents often need the most attention because they constantly pull in air or sit where dust, pet hair, and debris naturally settle.
Here are the main air vents you should focus on cleaning:
- Supply Vents: These vents deliver heated or cooled air into your rooms. Dust buildup around supply vents can restrict airflow and make parts of your home feel less comfortable.
- Return Air Vents: These vents pull air back into your HVAC system to be heated or cooled again. Because they constantly draw in air from throughout your home, they often collect dust, pet hair, and debris more quickly than supply vents.
- Ceiling Vents: Dust can accumulate on your vent covers and around the opening over time, especially in rooms with higher airflow.
- Wall Vents: Wall-mounted vents can collect dust that may affect airflow and contribute to dust buildup around your living spaces.
- Floor Vents: Floor vents often collect the most visible debris because dirt, dust, and pet hair naturally settle downward.
How To Clean Your Air Vents
Cleaning air vents is an easy way to remove built up dust, dirt, and debris and prevent it from flowing around your home.
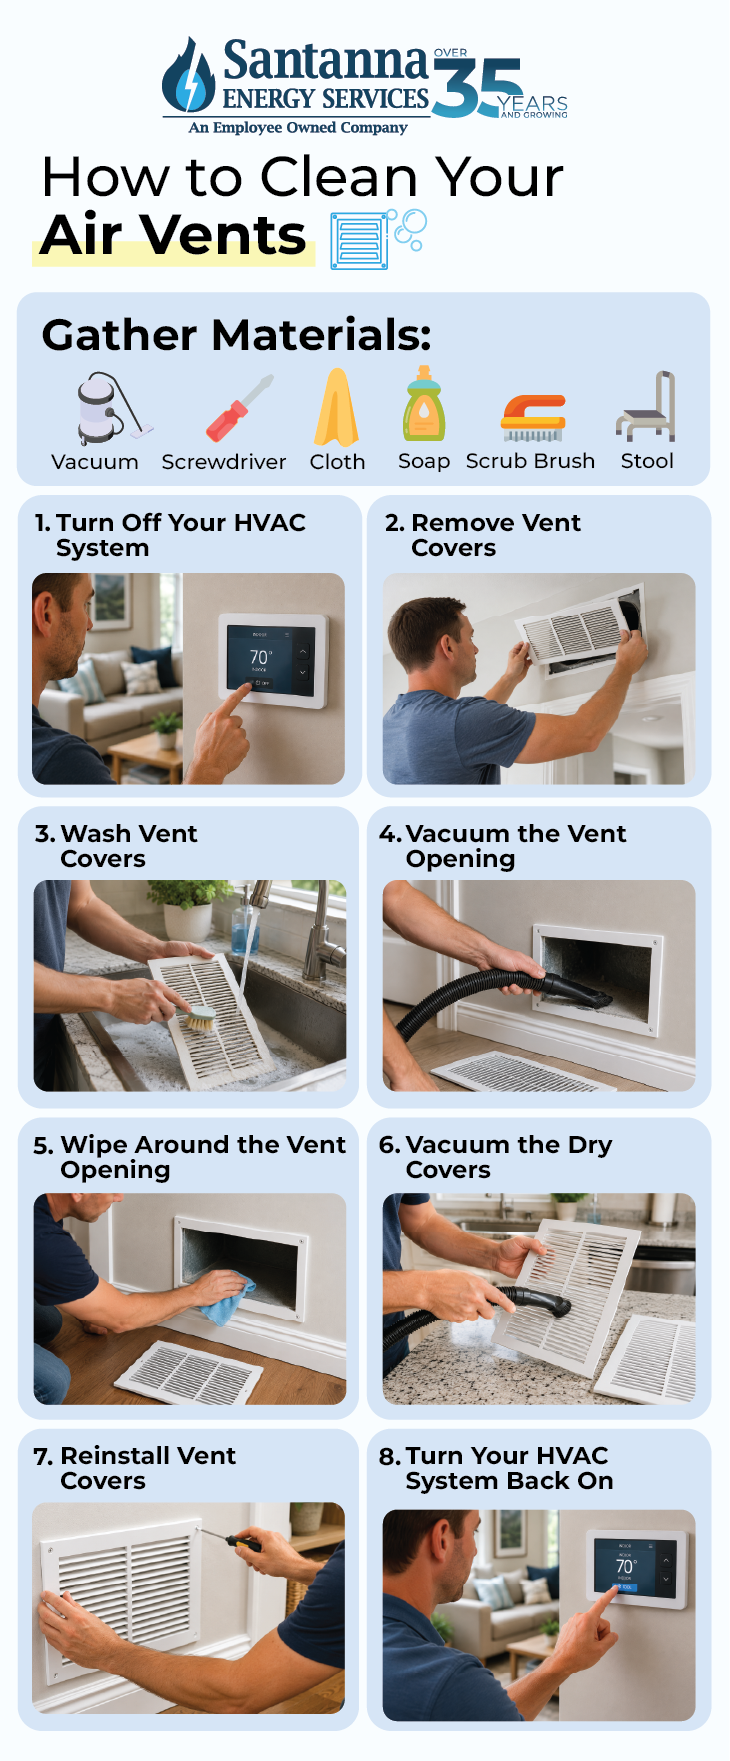
Here’s a simple step-by-step guide on how to clean your air vents safely and remove common dust and debris buildup.
Step 1: Gather Your Cleaning Materials
Before you begin, gather the following supplies and make sure the area around the vent is clear. If you’re cleaning a ceiling vent, use a sturdy step stool or ladder and never stand on furniture.
- Vacuum with a brush attachment
- Screwdriver
- Microfiber cloth
- Warm water and mild soap
- Soft brush
- Step stool or ladder (for ceiling vents)
Once you have everything ready, you can begin cleaning your air vents and removing visible dust and debris.
Step 2: Turn Off Your HVAC System
Before cleaning any air vents, turn off your heating or cooling system at the thermostat. This helps prevent dust from circulating through your home while you clean and makes it easier to remove debris from the vent opening.
Step 3: Remove the Vent Covers
Carefully remove the vent covers or registers. If the cover is secured with screws, use a screwdriver to loosen and remove them.
Some vent covers can be lifted off easily, while others may be secured with screws. Place the screws and vent cover in a safe location until you are ready to reinstall them.
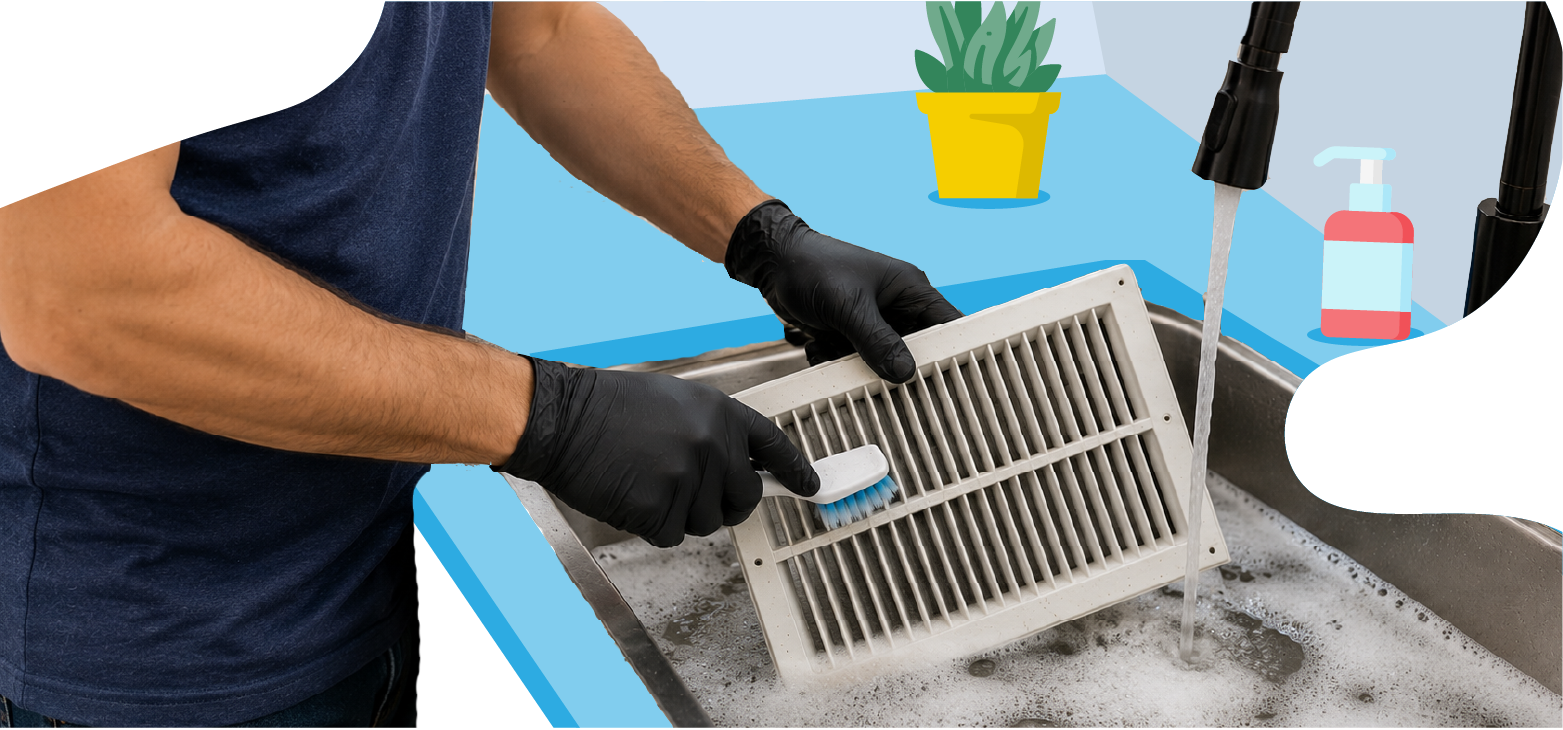
Step 4: Wash the Vent Covers
Wash the vent covers using warm water and mild soap. If there is stubborn dirt or dust buildup, use a soft brush or cloth to gently scrub the surface. Once clean, allow the vent covers to dry completely before reinstalling them.
According to the National Air Duct Cleaners Association (NADCA), you should clean your HVAC systems only with EPA-approved antimicrobial chemicals like sanitizers and disinfectants if needed to control odors or germs.
Step 5: Vacuum Inside the Vent Opening
Use a vacuum with a brush or hose attachment to remove loose dust, pet hair, and debris from the vent opening. Focus only on areas you can safely reach without inserting tools deep into the ductwork.
Several employee-owners also said regularly vacuuming vent openings helped keep dust from accumulating in vents between deeper cleanings.
Step 6: Wipe Around the Vent Opening
Use a microfiber cloth to wipe dust from the edges of the vent opening and surrounding surfaces. This helps remove any remaining dust that the vacuum may have missed, leaving the area cleaner overall.
Step 7: Vacuum Your Vent Cover
Use a vacuum with a brush attachment to remove any remaining dust, lint, pet hair, or debris from both sides of the vent cover. Pay close attention to the slats and corners where buildup can collect. If dust is stuck in narrow openings, use a soft brush or microfiber cloth to loosen it before vacuuming again.
Step 8: Reinstall the Vent Covers
Once the vent covers are completely dry, place them back over the vent opening and secure them if needed. Make sure the covers sit properly and are free from obstructions that could affect airflow.
Step 9: Turn Your HVAC System Back On
Turn your heating or cooling system back on and check airflow from the cleaned vents. You may notice less dust around the vent cover and improved airflow if dust buildup was contributing to the problem.
How To Clean Air Vents in the Ceiling
Cleaning ceiling air vents is similar to cleaning other air vents, but it requires a little extra care because you’re working overhead, and dust can easily fall during cleaning. We suggest wearing protection around your eyes to protect your eyes from debris as you clean.
Let’s take a closer look at how to clean air vents in the ceiling and remove common dust buildup safely:
Step 1: Use a Stable Step Stool or Ladder
Place a sturdy step stool or ladder on a flat, stable surface. Make sure you can comfortably reach the vent without stretching, leaning, or standing on furniture.
Step 2: Remove Loose Dust From the Vent Cover
Before removing the vent cover, use a vacuum with a brush attachment or a microfiber cloth to remove loose dust from the surface. This can help reduce the amount of dust that falls into the room.
Step 3: Remove the Vent Cover
Carefully remove the screws or fasteners holding the vent cover in place. Hold the cover securely as you remove it so it does not fall.
Step 4: Wash the Vent Cover
Clean the vent cover using warm water and mild soap. Use a soft brush or cloth to remove dust and dirt from the openings, then allow it to dry completely.
Step 5: Vacuum Around the Vent Opening
Use a vacuum with a hose attachment to remove visible dust, cobwebs, and debris around the vent opening. Only clean areas that are easily visible and safely accessible.
Step 6: Reinstall the Vent Cover
Once the vent cover is completely dry, reinstall it securely and make sure the vent openings are unobstructed.
Step 7: Check Ceiling Vents Periodically
Because ceiling vents are easy to overlook, inspect them every few months for dust buildup. Regular cleaning can help keep airflow moving freely and prevent excessive dust from accumulating over time.
How To Clean Moldy Air Vents
Small amounts of visible mold on an air vent cover can often be cleaned, but it’s important to do so carefully and safely.
If you notice mold on a vent cover, wear protective gloves and a mask before cleaning. If mold covers a large area, keeps returning, or appears deep inside the vent, it’s best to contact a qualified professional for further inspection.
Let’s take a closer look at how to clean moldy air vents and remove visible mold from an air vent cover safely:
Step 1: Turn Off Your HVAC System
Turn off your heating or cooling system before cleaning to help prevent air from circulating while you work.
Step 2: Wear Gloves and a Mask
Wear disposable gloves and a mask to reduce direct contact with mold and mold particles.
Step 3: Remove the Vent Cover
Carefully remove the vent cover and place it on a surface where it can easily be cleaned.
Step 4: Clean the Mold From the Vent Cover
Wash the vent cover thoroughly using warm water and mild soap. For visible mold, you may also use a mixture of water and vinegar. Gently scrub the surface with a soft brush or cloth until the mold and dirt have been removed.
Step 5: Rinse and Dry Completely
Rinse the vent cover thoroughly and allow it to dry completely before reinstalling it. Moisture left behind can contribute to future mold growth.
Step 6: Reinstall the Vent Cover
Once the vent cover is completely dry, reinstall it securely.
Step 7: Monitor the Vent
Check the vent periodically for signs of returning mold. If mold keeps coming back, it may be a sign of a deeper moisture issue. In that case, call a qualified professional who can help identify the cause and recommend the appropriate solution.
Does Cleaning Air Vents Improve Airflow and HVAC Efficiency?
Yes, cleaning air vents can improve airflow and help your HVAC system operate more efficiently than when dust, debris, or pet hair is restricting airflow.
According to the National Air Duct Cleaners Association (NADCA), HVAC cleaning, including cleaning your air vents, can enhance your airflow between 10% and 46% compared to uncleaned systems.
When air can move more freely throughout your home, rooms may feel more comfortable and your heating and cooling system may not have to work as hard to maintain your desired temperature.
One thing worth keeping in mind is that cleaning air vents is not a solution for every airflow problem. Issues such as dirty air filters, blocked return vents, leaky ductwork, or aging HVAC equipment can also affect airflow and HVAC performance.
If some rooms feel stuffy, airflow seems weak, or your HVAC system runs longer than expected, vent cleaning may be a good place to start. If airflow or comfort issues continue after cleaning, it may be time to call a qualified HVAC professional.
How Do Dirty Air Vents Impact Energy Consumption?
Dirty air vents can contribute to higher energy use if dust and debris restrict airflow throughout your home.
When less heated or cooled air reaches your rooms, your HVAC system may need to run longer to maintain the temperature you have set. Over time, those longer heating and cooling cycles can use more electricity or natural gas and may contribute to higher energy bills.
While dirty air vents alone are unlikely to have a major impact on your energy bill, airflow restrictions anywhere in the HVAC system can reduce efficiency and increase runtime.
If a restricted airflow caused an HVAC system to use an extra 50 to 100 kWh of electricity per month, a homeowner paying 18.83 cents per kWh would spend approximately $9.42 to $18.83 more per month. While actual costs vary from home to home, this example shows how airflow problems can gradually increase energy use over time.
Our employee-owner survey revealed another interesting trend: when asked which maintenance habit made the biggest difference for their HVAC system, nearly half of respondents pointed to regularly changing their HVAC filter. Others highlighted cleaning vents and registers, scheduling annual HVAC maintenance, and keeping condensate drain lines clear.
This is why maintaining clean air vents, replacing HVAC filters regularly, and addressing other airflow issues can help support efficient HVAC performance, lower unnecessary energy use, and keep your home more comfortable.
Why Do My Air Vents Keep Getting Dirty?
If your air vents keep getting dirty or airflow still feels weak after cleaning, the problem may not be the vents themselves. In many homes, dust buildup and airflow issues can be caused by other parts of the HVAC system or conditions inside the home.
Some of the most common causes include:
- Dirty HVAC filters
- Pet hair and dander
- High dust levels inside the home
- Recent renovation or construction projects
- Furniture blocking supply or return vents
- Leaky ductwork
- Dirty HVAC components
- Aging or improperly sized HVAC equipment
One thing worth keeping in mind is that air vents are often where the symptoms show up, not necessarily where the problem starts. If dust buildup or airflow problems continue after cleaning your vents, it may be best to contact a qualified HVAC professional who can inspect the system and identify the cause.
Once the underlying issue is addressed, you may notice better comfort, less recurring dust buildup, and improved airflow throughout your home.
Why Do My Air Vents Smell Like Sewage?
Your air vents may smell like sewage because an odor from somewhere else in the home is being pulled into the HVAC system and circulated through the vents.
In many cases, the vent itself is not the source of the smell. Instead, your heating and cooling system may be carrying odors from a nearby drain, moisture problem, mold growth, or another issue elsewhere in the home.
Some common causes of sewage-like odors near air vents include:
- A dry floor drain near the furnace or air handler
Water normally sits inside floor drains to block sewer gases. If the drain dries out, sewer odors can enter the home. Pour water into the drain to refill the trap.
- A dirty or clogged indoor coil drain pan
Standing water, dirt, or biological growth in the drain pan can create unpleasant odors that spread through the HVAC system. Inspect the drain pan and clean it if it is accessible.
- A clogged condensate drain line
Moisture that cannot drain properly may lead to odors and excess moisture around HVAC equipment. Check for standing water around the indoor unit and have the drain line inspected if needed.
- Mold or mildew near HVAC components
Excess moisture can allow mold or mildew to develop near the indoor unit or nearby building materials. Look for signs of moisture, water damage, or visible mold around the area.
- A dry plumbing drain trap elsewhere in the home
Unused sinks, showers, tubs, or basement drains can lose the water seal that normally blocks sewer gases. Run water in rarely used fixtures for a few minutes.
- A damaged or leaking sewer vent pipe
Cracks or leaks in plumbing vent pipes can allow sewer gases to enter the home. Contact a plumber if odors persist and no obvious source can be found.
- A dead animal or pest issue near ductwork
Rodents or other pests can sometimes create strong odors that travel through the HVAC system. Inspect accessible areas around the HVAC system and attic for signs of pests.
It’s important to remember that sewage-like odors are usually a sign that something other than dirty air vents needs attention.
If the smell continues after checking these common causes, it may be best to contact a qualified HVAC technician or licensed plumber who can help identify the source and prevent the odor from continuing to circulate throughout your home.
How Can You Improve HVAC Efficiency Beyond Cleaning Air Vents?
You can improve HVAC efficiency beyond cleaning air vents by maintaining good airflow throughout your entire home and keeping your heating and cooling system properly maintained.
While clean air vents can help support airflow, they are only one part of the bigger picture. Air must be able to move freely through vents, filters, return openings, and living spaces for your HVAC system to operate as efficiently as possible.
Let’s take a closer look at some simple ways to improve HVAC efficiency and help your heating and cooling system operate more effectively year-round:
- Replace HVAC Filters Regularly: Replacing HVAC filters is one of the simplest ways to support airflow and HVAC efficiency. Experts estimate that a dirty filter can increase energy consumption by up to 15% because it makes it harder for air to move through the system.
- Keep Furniture Away From Supply Vents: Furniture placed directly in front of vents can block airflow and prevent heated or cooled air from reaching the room effectively. Keeping vents unobstructed helps air circulate more evenly throughout your home.
- Keep Return Vents Open and Clear: Return vents pull air back to the HVAC system so it can be heated or cooled again. Blocking return vents with furniture, storage bins, curtains, or other items can restrict airflow and reduce overall system performance.
- Seal Air Leaks Around Doors and Windows: Air leaks can allow heated or cooled air to escape before it reaches the areas where it is needed. Sealing gaps around doors and windows can help reduce energy loss, support better airflow, and make it easier for your HVAC system to keep your home comfortable.
- Schedule Routine HVAC Maintenance: Regular HVAC maintenance can help identify airflow issues, worn components, and other problems before they affect comfort or system performance. Keeping your system in good condition can help support efficient operation throughout the year.
- Make Sure Every Room Has Proper Airflow: If certain rooms consistently feel warmer, cooler, stuffier, or less comfortable than others, airflow may not be distributed evenly throughout the home. Addressing airflow imbalances can help improve comfort and reduce unnecessary strain on your heating and cooling system.
FAQs
What is a return air vent?
A return air vent, sometimes called a return grille or cold air return vent, pulls air from your home back into the HVAC system so it can be heated or cooled and circulated again.
How often should return air vents be cleaned?
Return air vents should generally be checked and cleaned every few months or whenever visible dust and debris begin to accumulate.
What is the difference between air vent cleaning and air duct cleaning?
Air vent cleaning focuses on visible vent covers and openings inside your home, while air duct cleaning involves cleaning deeper sections of the ductwork. Most homeowners can clean air vents themselves, while air duct cleaning typically requires specialized equipment and professional service.
Should all air vents stay open in a house?
In most homes, air vents should remain open to help maintain proper airflow and allow the HVAC system to operate as intended.
How much airflow should come out of an air vent?
The amount of airflow varies by room size and HVAC design, but airflow should generally feel steady and strong enough to comfortably heat or cool the space.
Can dirty air vents affect indoor air quality?
Yes, dirty air vents can contribute to dust buildup and may circulate particles that can affect indoor air quality.
Cleaning your air vents is a simple way to help improve airflow, reduce dust buildup, and keep air moving more freely throughout your home. While cleaning vents will not fix every airflow problem, it is often a good first step when rooms feel stuffy, airflow seems weak, or dust starts collecting around vent covers.
Just remember that clean vents are only one part of the picture. Regular HVAC filter changes, clear return vents, and routine system maintenance can all help support better airflow and keep your home comfortable throughout the year.
The same idea applies to your energy costs. While you cannot control the weather, you can reduce surprises where possible. Santanna’s Unlimited Energy plan offers a predictable supply charge that can help provide added peace of mind, especially during seasons when heating or cooling use is higher.*
Because whether it is keeping your home comfortable or managing your energy costs, a little more predictability can go a long way.
* Restrictions apply. Enrollment based upon program eligibility. Customers using more than 125% of normal monthly usage as determined by Santanna may be required to switch plans.
Jenna Mendez is a Midwest native with lifelong roots in Illinois and time spent in Ohio during college, giving her a deep understanding of the Midwest region’s people, climate, and energy needs. She brings firsthand experience and local insight to topics that matter to Midwest homeowners, especially energy efficiency, sustainability, and home living. Jenna specializes in writing about eco-friendly living, all things Midwest, renewable energy, and practical ways to reduce energy costs. Jenna brings a trusted, and local hometown voice to every article she writes, helping readers live well, and sustainably, right where they are.